
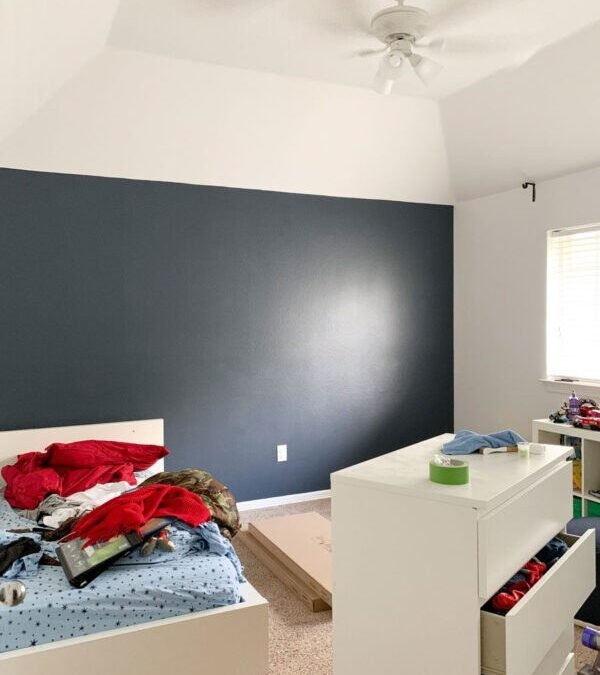
Fresh paint can transform a tired bedroom faster than almost any other home project, provided the preparation receives as much patience as the colour itself. A calm system, decent tools, and two full coats let a complete beginner finish walls that look hired in. Nothing about the work demands rare talent. It demands sequence: gather everything before opening a tin, test the colour where light actually falls, repair the surface before coating it, and let each coat dry on its own schedule rather than yours. Beginners who respect that sequence produce rooms that guests assume cost professional rates, while rushed painters with expensive paint produce streaks, peeling edges, and a second weekend of repairs.
Paint, Rollers, Brushes, and Preparation Supplies for a First Room
Gather the full kit before anything else, because mid job trips to buy forgotten supplies break rhythm and let wet edges dry. The list runs longer than the paint itself: interior wall paint in the chosen finish, an angled brush for edges, a roller frame with medium pile sleeves, a paint tray with liners, an extension pole, painter tape, dust sheets, filler, a filling knife, sandpaper in medium and fine grades, a sanding block, sugar soap or a mild detergent, sponges, a bucket, a ladder or sturdy step platform, a screwdriver for socket covers, and a stir stick for every tin. Buy brushes and sleeves a step above the cheapest shelf, since shed bristles and collapsing foam announce themselves across finished walls, and the same decent brushes will later serve anyone tackling painting kitchen cabinets once wall confidence settles.
Choosing the paint rewards a little reading. A detailed account of paint composition and types explains how pigments, binders, and solvents combine into the water based latex formulas on most shelves, the coatings that dry by evaporation and keep curing for weeks after they feel dry. Sheen selection shapes the room as much as colour: flat finishes forgive surface flaws yet mark at a touch, eggshell and satin hold a soft glow while wiping clean, and glossier finishes belong on trim and in damp rooms. The roller deserves equal thought, and a clear account of paint roller design and application shows how frame, sleeve material, and pile length decide how much paint the tool carries and how smooth a surface it leaves behind bare plaster versus previously painted walls.
Testing Colour Swatches Under Morning and Evening Light Indoors
Colour lies politely in the shop and tells the truth only on your own walls. Paint generous test patches directly onto at least two walls that receive different light, large enough to judge from across the room, and live with them through a full day before committing. Morning light runs cool and revealing, afternoon sun warms everything it touches, and evening lamplight can pull hidden yellow or grey from a shade that looked clean at noon. Hold bedding, curtains, and furniture fabric against the dried patches, because a colour that flatters bare plaster may fight the furnishings the room actually contains. Photographs help compare candidates side by side, though screens shift tones, so the dried patch on the wall remains the final authority.
Undertone causes most disappointments, and testing exposes it cheaply. Whites lean blue, pink, or creamy; greys slide toward green or violet; bold colours intensify once four walls reflect one another. Painting a large sheet of lining paper instead of the wall itself lets the patch move between walls and windows, which suits anyone torn between two close shades. Decide by the hour the room gets used most: a bedroom judged mainly by lamplight should please under lamplight, even if midday finds it slightly deeper than expected. Once chosen, buy enough paint for both coats plus touch ups in a single purchase, since batch variation between tins bought weeks apart can show across a shared wall.
Filling Holes, Sanding, Washing, and Taping Before Any Coating
Preparation decides the finish more than any painting technique, because paint adheres poorly to dust, grease, and loose material, and it highlights every defect it covers. Remove pictures and hardware, then fill nail holes, hairline cracks, and dents with filler pressed firmly into each void, slightly proud of the surface. Once filler hardens, sand it flush with a fine block, feathering edges so no ridge survives beneath the coating. Sand glossy or rough patches elsewhere on the wall as needed, then wash everything with sugar soap solution, working top downward, to lift the invisible film of grease and household dust. Rinse with clean water, let walls dry fully, and vacuum the room so settled grit never migrates into wet paint.
Older homes carry one serious caution. Paint layers applied before the late nineteen seventies may contain lead, and disturbing such coatings through dry sanding spreads hazardous dust through the house. Where age raises the question, test first and follow lead safe working practices, favouring wet methods and proper containment over enthusiastic sanding. With surfaces sound, protect everything paint should never touch: tape along skirting, window frames, and ceiling edges with firm pressure along the sealing edge, remove or loosen socket covers, shift furniture to the centre, and spread dust sheets wall to wall. Tape applied patiently in long, straight runs saves more finishing time than any other single habit in the whole project.
Brushing Edges Then Rolling Before the Border Paint Dries
Application begins at the edges. Cutting in means brushing a careful band of paint along ceilings, corners, skirting, and around sockets and switches, wide enough that the roller can overlap it without touching trim. Load the angled brush moderately, tap off the excess, and draw each stroke in one confident direction, keeping the band smooth and free of ridges that would telegraph through the rolled surface. Work one wall at a time from this point onward, because the rolled coat must blend into the brushed band while that band stays wet; a dried edge leaves a visible frame around the wall, the telltale border beginners recognise too late.
Rolling follows immediately on the same wall. Load the sleeve evenly by rolling it through the tray well until the pile holds paint without dripping, then apply in overlapping vertical passes, spreading the load before returning for more. Keep a wet edge at all times, rolling back into the previous pass while it glistens, and resist pressing hard to stretch the paint, since pressure starves the coat and leaves stripes. Cover the wall in sections roughly an arm span wide, finish each section with light downward strokes to settle the texture, and inspect from a low side angle where holidays and thin patches catch the light. Step back between sections rather than judging from inches away, because rooms are viewed from doorways, not from ladders.
Lighting deserves a final word before the coat dries beyond repair. Work in the brightest light available, ideally daylight supplemented by a lamp moved around the room, because a single ceiling bulb flattens texture and hides thin coverage until furniture returns and evening exposes every stripe. Paint one wall completely before judging it, since half finished sections always look worse than they are, and keep pets and children out of the room entirely while surfaces stay wet. Fur and small fingerprints embedded in a drying coat demand sanding and recoating, which costs far more patience than a closed door ever will.
Applying the Second Coat After the First Has Dried Properly
Waiting separates a durable finish from a wrinkled one. The first coat may feel dry within hours, yet recoating too early softens the layer beneath, drags it into rolls, and traps moisture that later blisters. Follow the drying time printed on the tin as a minimum, extending it in cold or humid rooms where evaporation slows. Between coats, wrap brushes and sleeves tightly in plastic to keep them workable, pour tray leftovers back, and inspect the dried first coat under raking light. Any filled patch that flashes through, any missed strip along an edge, and any grit nib embedded in the surface gets attention now: light sanding, a wipedown, and spot priming where filler shows through the colour.
The second coat repeats the full rhythm without shortcuts: brush the edges of one wall, roll while the band stays wet, move to the next wall. Two thinner coats cover more evenly and dry more reliably than one heavy coat, which sags on vertical surfaces, wrinkles as the skin forms over wet paint beneath, and cures unevenly for weeks. Expect the true colour only now, since the first coat often reads patchy and lighter than the tin promised. Roll with the same pressure and pattern used before so texture stays uniform, and keep the room ventilated throughout, opening windows once surface dust has settled so airflow helps curing without landing debris on wet walls.
Peeling Tape While Paint Feels Tacky and Storing Leftover Paint
Finishing begins while the final coat still feels slightly tacky. Peel painter tape then, pulling it slowly back on itself at a low angle, so the film parts cleanly along the taped line instead of tearing dried paint away in flakes. Any bleed beneath an edge gets touched in with the angled brush once surrounding paint cures, using a nearly dry brush and a steady hand rather than fresh tape lines over soft coating. Remove dust sheets by folding them inward, refit socket covers, and return furniture only after the surface has hardened beyond fingerprint stage, remembering that full curing continues quietly for several weeks, so heavy objects and cleaning sprays stay gentle with the walls meanwhile.
Leftover paint stores well when handled properly. Wipe the tin rim clean, seal the lid firmly with a mallet over a cloth, and label the tin with the room, the colour name, and the date, since memory blurs shades faster than anyone expects. Store tins off cold floors, away from frost and heat, and decant small amounts into a clean jar for touch ups so the main tin opens rarely and skins over slowly. Rollers washed promptly in warm soapy water, combed, and dried upright return to service for years, and a written note of the colour code kept with household papers turns a future scuff repair into a ten minute errand. Standing back at the doorway, the room reads calm, even, and intentional, and the skills settled here transfer directly to the next set of walls, doors, or cabinets the household decides to refresh.


