
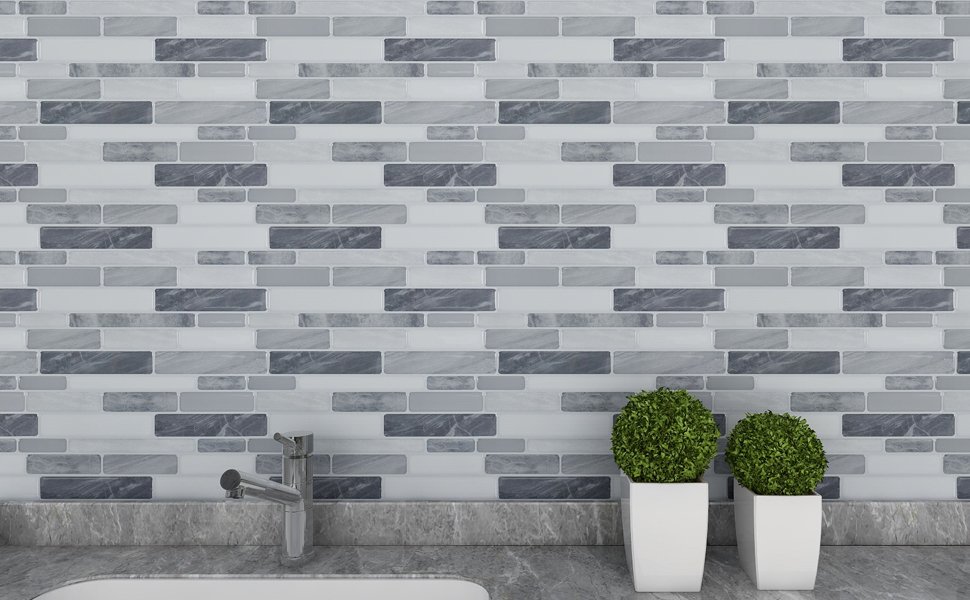
A kitchen wall behind the cooker endures splashes daily, yet covering it well sits comfortably within beginner reach. Area stays modest, cuts stay few, and modern materials forgive the small hesitations every newcomer feels. Success depends less on talent than on choosing a forgiving format and refusing to rush drying stages. By the final wipe down, most first timers wonder why the project felt intimidating at all. The wall in question is usually short, bounded by cabinets, worktop, and cooker, which keeps the learning curve gentle and the sense of progress quick from the very first row onward.
Comparing Peel and Stick, Mortar Set, and Panel Options
Three families of products compete for this wall, and each asks something different of a beginner. Peel and stick pieces arrive with adhesive already applied, so fixing them involves peeling a backing, positioning carefully, and pressing firmly. Mortar set work uses a bed of adhesive spread fresh on the wall, giving adjustment time while pieces are placed but demanding more preparation and patience. Large panels cover ground quickly with very few joints, though a single misaligned panel shows more plainly than a single tile sitting slightly off. Weigh appearance, tolerance for adjustment, and how permanent the result should feel, because removing a bonded panel later is a far bigger job than lifting one small tile.
Beginners in kitchens often learn most from small jobs that go slightly wrong in harmless ways, and the same caution applies here as it does to plumbing tasks, where kitchen faucet replacement mistakes show how skipping a simple shutoff or rushing a fitting turns an easy task into a wet one. Tiling rewards the same habit of pausing before anything becomes hard to undo. A dry run on the worktop, a level line checked twice, and a willingness to peel back and reposition early work protect the finished wall far more than any expensive tool. Think of the comparison less as a contest and more as matching temperament: tidy planners often enjoy mortar work, while anyone who dreads mixing and washing tools usually prefers adhesive backed pieces or panels.
Durability and heat deserve honest thought in this comparison. Behind a cooker, surfaces face steam, grease, and repeated wiping, so finishes should tolerate gentle cleaning without loosening at the edges. Mortar set ceramic has the longest track record in such spots and shrugs off heat comfortably. Peel and stick products vary, so reading the maker guidance about distance from direct heat matters before committing a whole wall. Panels sit between the two, offering sealed surfaces with few joints for grease to settle in, but their edges and trims need careful finishing to stay watertight. None of these routes is wrong in itself; the poor choice is the one whose upkeep and limits the household will resent within a year.
Measuring and Planning Layout Before Opening Any Boxes
Measure the wall in several places, because kitchens rarely offer a perfectly rectangle. Record height at both ends and in the middle, width along the worktop and again higher up, and note every socket, switch, and cabinet edge that interrupts the field. Sketch the area on paper to a rough scale and mark where full pieces will land and where cuts will fall. A layout that places cut pieces in corners and below cabinets looks calmer than one that leaves thin slivers in the most visible stretch above the cooker. Small shifts in the starting point can remove an awkward sliver entirely, which is why planning on paper beats discovering the problem with adhesive already spread.
Dry fitting is the heart of good planning. Lay rows out on the worktop or floor in the exact order they will climb the wall, with spacers between pieces, and step back to judge the pattern at normal viewing distance. Check how joints align around sockets, since a socket landing on a joint line is far easier to work around than one stranded in the middle of a piece. Count pieces, allow a sensible margin for cuts that go wrong, and keep spare material from the same batch so colour and thickness match if a replacement is ever needed. Only when the dry arrangement satisfies you should boxes be opened in earnest and the wall prepared.
Preparation closes this planning stage. Switch off power to any sockets within the work area at the consumer unit, test that they are dead, and remove their cover plates so pieces can sit neatly behind the fittings later. Wash the wall to remove grease, rinse away cleaning residue, and let the surface dry fully, because adhesive of any kind bonds poorly to a greasy or damp background. Fill deep dips, sand ridges that would tilt a piece, and draw a level starting line where the bottom row will sit, supporting that row with a temporary batten if the worktop edge is not level. Time spent here feels slow, yet every later stage moves faster for it.
Cutting, Spacing, and Fixing Tiles as a Complete Beginner
Cutting holds its fear mostly in imagination. Straight cuts on ceramic pieces can be scored firmly and snapped cleanly with a simple cutter, while awkward notches around sockets yield to patient nibbling with a small hand tool. Practice on a spare piece first, mark cuts on the face you will see, and remember that edges hidden by a socket cover or tucked into a corner do not need a flawless finish. Historical context steadies nerves a little, since coverage of tile history and materials on Wikipedia records how ceramic and stone pieces have covered kitchen and bathroom walls for centuries, long before power tools existed, which puts a hand cutter and a steady hand in good company.
Fixing follows a calm rhythm once the first row sits level. For mortar set work, spread adhesive over a modest patch, comb it into even ridges, and press each piece home with a slight settling motion so the bed makes full contact. For adhesive backed pieces, align slowly from one edge, because contact bonds quickly and repositioning grows harder with every inch pressed down. Drop spacers between pieces as you go, wipe stray adhesive from faces before it skins, and check alignment with a straight edge every few rows. Drift caught early takes seconds to correct, while drift discovered near the top can demand removing a whole section, so frequent small checks are the beginner friendliest habit of all.
Work outward from the most visible point so any cut pieces finish in corners and less noticed edges. Take breaks before tiredness creeps in, because late mistakes cluster in rushed final rows. Keep a damp cloth nearby, keep the workspace swept so grit does not scratch faces or lodge behind pieces, and resist pressing pieces harder in one spot than another, since uneven pressure creates lips that catch light and collect grease. When the field is complete, step into the doorway and view the wall as a visitor would, scanning for wandering lines or a single piece sitting proud. Mark anything needing attention while fixing material still allows gentle adjustment.
Grouting and Sealing Without Rushing the Finishing Stage
Grouting begins only after the fixing stage has fully set, however tempting it feels to finish in one push. Patience at this point protects everything beneath, because disturbing soft adhesive while forcing filler into joints can tilt pieces that looked perfect an hour earlier. Mix filler to a smooth, thick consistency, or use a ready prepared version if mixing feels like one variable too many on a first attempt. Work it into joints with a flexible float held at an angle, pressing firmly so each gap fills solidly from the back rather than bridging across the top. Hollow joints look fine for a week and then crack or crumble, so firm pressure matters more than speed.
The role of the material between pieces is easy to underestimate, and Wikipedia material on grout composition and purpose explains how filler placed between tiles supports their edges and helps keep moisture and debris out of joints once cured. That sealing role explains the wiping technique as well. After a short wait, wash faces with a sponge that is damp rather than soaking, moving diagonally so joints are not dragged empty. Rinse the sponge often, change the water when it clouds, and repeat a light wipe later to clear the soft haze that forms as surfaces dry. Excess water at any point weakens the filler and pales its colour, so wring the sponge thoroughly every time.
Sealing and edging complete the wall. Once the filler has cured for the period its maker specifies, a suitable sealer brushed or wiped over joints helps resist staining behind the cooker, where splashes are constant. Seal the junction with the worktop using a flexible waterproof sealant rather than rigid filler, because the two surfaces move slightly against each other and a rigid joint will crack. Refit socket covers once everything is dry, restore power, and stand back for a final inspection in daylight and under cabinet lights, since different light reveals different flaws. Small blemishes can be touched in calmly; a sound, well sealed wall should now handle daily cooking without complaint.
A Recommendation for First Time Kitchen Tilers
For a genuine first attempt, choose the forgiving route: small or medium format pieces with adhesive already applied, or a straightforward mortar set layout using plain rectangular pieces in a simple stacked or offset pattern. Both approaches keep cuts few, alignment easy to judge, and corrections possible without drama. Panels suit confident measurers who want speed, yet their unforgiving scale makes them a better second project than a first. Whatever the choice, keep the pattern simple, the colour calm, and the fancy borders for a later wall, because a neat plain finish reads as skill while a crooked elaborate pattern reads as struggle, however costly the materials were.
Budget time generously and treat drying stages as part of the craft rather than delays. A wall planned on one day, fixed on another, and finished after proper curing will outlast and outshine a wall rushed through in a single exhausting session. Keep notes on products, batch details, and any spots that gave trouble, and store leftover pieces somewhere safe, since a future chip is far easier to mend with matching material on hand. Most importantly, judge the result by daily use: a splashback that wipes clean, sits flat, and pleases you each morning has succeeded completely, regardless of the tiny imperfections only its maker will ever notice.


One comment