
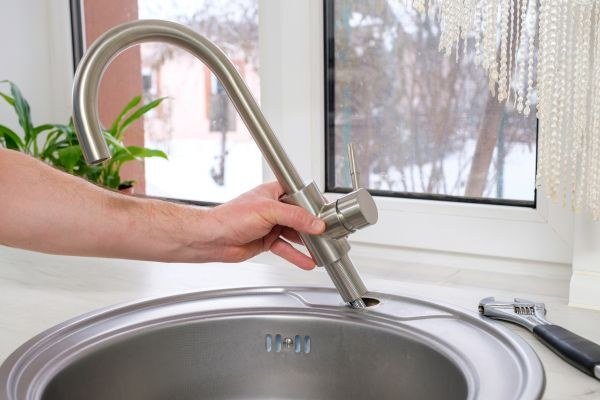
Working blind beneath a sink turns a straightforward faucet swap into leaks, seized nuts, and a damaged cabinet floor. Naming the recurring errors in advance makes each one easy to sidestep during the job. Nine distinct mistakes explain most failed swaps, and they spread across the whole task, from the first reach for a shutoff valve to the day the old unit finally leaves the house. Reading them as one sequence turns a cramped, awkward job into a series of small, manageable decisions.
Supply Shutoff Failures and Water Trapped in Old Lines
Mistake one — leaving supplies open and undrained at the start. The valves beneath the sink govern everything that follows, and they need closing fully, then proving closed, before any fitting loosens. Opening the old faucet after the valves shut releases line pressure and confirms the closure held, because a valve that still passes a trickle will pass a flood once a supply line hangs free. Older valves seize or weep after years without movement, and discovering that during a calm test beats discovering it with water sheeting across the cabinet floor.
Draining deserves the same discipline as shutting off. Water sits trapped inside the old faucet body and both supply lines even after pressure falls, and it escapes the moment connections part. A shallow tray, a bucket, and old towels arranged before the first nut turns catch that release harmlessly. Emptying the cabinet completely, including cleaning bottles stored at the back, gives the worker room to lie flat, keeps chemicals away from open pipe ends, and leaves a dry floor where any later drip will show itself clearly.
Light and access shape the work more than strength does. A head torch or a work lamp aimed into the cabinet reveals valve positions, hose routes, and the mounting hardware hidden behind the sink bowls. Clearing that view at the start also exposes the state of the valves themselves: green corrosion, damp staining, or a valve body that turns without resistance all warn that the shutoff hardware may need renewal before the faucet swap can proceed safely at all.
Hole Count, Spout Reach, and Deck Fit Checked Before Buying
Mistake two — choosing a model whose hole pattern fights the sink deck. Decks carry several hole arrangements, and openings hide beneath the old fitting, beneath a separate sprayer, and beneath a soap dispenser that the eye forgets to count. Every opening needs counting before a purchase, because a faucet built for a single hole cannot cover a wide three hole deck without the cover plate many single lever models include, and some plates fall short on older, wider spacings. Measuring the spread between outer holes settles the question in the shop rather than at the sink.
Reach matters alongside hole count. A spout that lands its stream near the front edge of a deep bowl splashes the worktop on every use, while a spout arcing too far back strikes the rear wall of the bowl and sprays sideways. Bowl depth, deck thickness, and the clearance behind the sink beneath a window sill or shelf all limit which body shapes can physically stand upright and swing freely. Handles need swing room as well, particularly lever handles that rise and tilt toward the wall behind.
Deck thickness quietly decides whether mounting hardware can grip. Studs and nuts supplied with a faucet assume a certain range, and a thick stone worktop or an unusually thin steel deck can fall outside it. Checking the maker limits against a quick measurement, taken through an existing hole or from beneath, prevents the miserable discovery that the mounting nuts run out of thread before the base pulls tight, leaving a faucet that rocks no matter how firmly hands try to settle it.
Corroded Mounting Nuts Freed With Oil and a Basin Wrench
Mistake three — wrenching a corroded old unit free by brute force. Mounting nuts beneath a sink live in damp air for years, and their threads often arrive at removal day fused with scale and rust. Twisting harder against that grip risks cracking the sink, snapping a stud, or rounding the nut into a smooth ring that no tool can hold. Penetrating oil, given time to creep along the threads, loosens the bond chemically, and a second application after a patient wait frees nuts that shrugged off the first attempt entirely.
The basin wrench exists precisely for this cramped theatre of work. Its long shaft reaches up behind the bowl while its pivoting jaw swings into grip on nuts that ordinary spanners cannot approach squarely, and the jaw tightens its bite as torque applies. Working that tool slowly, with the faucet body steadied from above by a helper or a wedged block, keeps the whole fitting from rotating and twisting its supply lines into kinks while the nut travels down its stud.
Removal order protects the new installation. Supply lines part from the valves first, then the spray hose where one exists, and only then do mounting nuts come away, so the old unit lifts out cleanly without dragging connected hoses through the deck holes. Keeping the removed nuts, washers, and any odd brackets in a tray preserves a reference for how the maker arranged the clamping, knowledge that often decodes the new unit instructions faster than the printed diagram manages on its own.
Base Seals, Supply Threads, and the Cost of Excess Force
Mistake four — omitting the base gasket or putty seal beneath the new faucet. Clamping force alone does not make the base watertight, because water running down the spout and across the deck finds the unsealed seam and creeps beneath it, where it swells cabinet flooring and feeds hidden mould. Where the maker supplies a gasket, that gasket sits exactly as directed, and where none is provided, a thin bed of plumber putty rolled and pressed under the base closes the seam. Silicone belongs nowhere near that joint unless the maker demands it, since it glues the base down and punishes the next removal.
Mistake five — crossing supply threads or crushing their washers with excess turns. Supply connections seal on their washers, not on thread tightness, so a connection that binds at the opening turn has almost certainly crossed and needs backing off and starting square rather than more force. The correct order runs hand tight first, feeling the washer seat evenly, followed by a modest extra turn with a wrench. Overtightening splits washers, distorts the sealing face, and builds a slow weep that may take days to show through the cabinet floor below.
Thread tape has a narrow role here and gets misused often. Compression and washer sealed joints need no tape at all, and tape shreds worked into a washer seat can hold it open. Tapered pipe threads, by contrast, seal partly through the thread itself and do benefit from tape or jointing compound applied as the maker directs. Knowing which joint type sits in hand, before reaching for either tape or wrench, keeps the chemistry of the seal working with the design instead of against it.
Flushing Debris and Routing the Pull Down Spray Hose
Mistake six — connecting up without flushing loosened sediment away. Disturbing old valves and lines stirs scale and grit loose inside the supply pipes, and that debris travels straight into a new cartridge when the first water runs. Cartridges meter water through fine passages that a single grain can score or block, leaving a brand new faucet dripping or weak. Running each supply line into a bucket for a short flush before it meets the new unit carries the loosened sediment harmlessly away and confirms strong flow from both valves at the same time.
Mistake seven — positioning the pull down hose weight where it snags. The counterweight clipped along the spray hose pulls the sprayer home into its dock, and it belongs where the maker marks the hose, travelling through clear space as the hose extends and retracts. A weight clipped too high leaves the sprayer drooping from its seat, while one clipped too low collides with valves, waste pipes, and stored bottles, jerking the hose on every pull. Routing the hose loop away from the waste assembly during installation, then testing the full travel before the cabinet refills with clutter, keeps the action smooth.
The aerator earns a rinse at the same stage. Removing it before the first run lets trapped particles escape instead of lodging in its mesh, and running the faucet through hot and cold in turn, with the hose both docked and extended, exercises every passage the household will use. A sprayer pattern that splits or spits at this point usually blames debris in the head rather than a faulty unit, and a rinse under a running tap clears most cases without any dismantling at all.
Leak Testing Over Time and Keeping the Old Unit Briefly
Mistake eight — glancing once for leaks instead of testing over time. A dry joint at first inspection can still weep under sustained pressure, during a hot cycle that expands fittings, or when the spray hose shifts position. Dry tissue wiped around every joint after a long run reveals moisture far earlier than fingertips do, and leaving the cabinet empty with a dry tray beneath the valves overnight turns any slow drip into visible evidence. Testing belongs at full household pressure with the cabinet valves open, exactly as the installation will live.
Mistake nine — throwing the old unit out before the replacement has earned trust. The removed faucet carries spare aerators, an identical cartridge in some households, the cover plate a future deck change might need, and physical proof of hole spacing if questions arise later. Keeping it in a box for a few weeks costs a corner of shelf space and insures against surprises. Readers weighing whether the whole swap suits their own toolkit can compare against replacing a kitchen faucet with basic tools laid out as a household toolkit walkthrough, and keeping the old unit nearby makes that comparison concrete, since its valve stems and seats show exactly the tap and valve construction, seals, and cartridge arrangements that govern how any replacement behaves under pressure. Where a household also plans an upgrade, the WaterSense programme guidance on water efficient fixtures and labelled products explains how modern aerators and cartridges hold strong performance while using less water, which makes the replacement an improvement in running cost as well as reliability. After several weeks of dry joints and clean operation, the old unit can leave without regret.


