
Daylight visible around a closed door marks a gap that heated air pours through every hour of winter. Sealing that perimeter needs modest materials, careful fitting, and one honest test at the end. An exterior door has more moving edges than any window in the house, and each edge leaks in its own way. The good part is that every one of those leaks answers to a simple product, fitted with hand tools most homes already own. Work through the doorway zone by zone, measure before buying, and the result is a door that closes with a soft, even resistance and a hallway noticeably warmer by evening.
Materials and Hand Tools Gathered Before Removing Any Old Seals
Gather everything before the first old seal comes off, because a door stripped of its weatherstripping and left half finished leaks worse than one never touched. For the sides and top of the frame, buy either foam tape or compression strips, choosing thickness from a measured gap rather than a guess. For the bottom, buy a door sweep suited to the threshold, in brush, finned rubber, or combination form. For the joint outside where trim meets siding or brick, buy a tube of exterior sealant and a caulk gun. The tool list stays short: a tape measure, a utility knife or strong scissors, a screwdriver, a drill for sweep screws, a putty knife for old adhesive, and rubbing alcohol with clean rags for surface preparation. Add a flashlight and a sheet of paper for leak hunting and testing, plus a pencil for marking cut lengths. Lay everything out on a hallway table so each stage flows into the next without a trip to the store mid job.
Choosing between product families is easier with the background in place. Foam tape is the cheapest and most forgiving option, compressing into irregular gaps, though it wears soonest on a busy door. Compression strips, whether tubular rubber, silicone, or spring metal in a V profile, cost more and seal longer. Measure the gap at the head, both sides, and several points along the bottom before choosing, since a single doorway often needs two different thicknesses to seal evenly.
Old seals tell a story worth reading before they go in the trash. A strip flattened on one side only shows the door hangs out of alignment, while a seal perished along the bottom edge points to water reaching a spot it should never touch. Note what the wear pattern says and correct the cause during the job, otherwise the new material will fail in exactly the same place and pattern within a season or two. Photographing the closed door gaps with a ruler held beside them also gives a reference when standing in the store comparing thicknesses.
Work on a day when the door can stay open for stretches without freezing the house or inviting rain in sideways. Mild, dry weather keeps adhesives honest, keeps sealant curing as it should, and lets each stage be checked calmly before the next begins.
Finding Leaks Along the Sides, Top, and Threshold of the Door
Leak hunting comes before fitting, and a calm, methodical search beats a quick glance. Air leaves a doorway through distinct routes: the meeting surfaces between door and frame on the sides and top, the wider space beneath the door, the joint where frame trim meets the wall, and fittings such as letter slots, keyholes, and lock hardware. Federal air sealing guidance treats doors and windows together as priority targets because their combined leakage undermines heating and cooling efficiency all year, so a doorway deserves the same care as any window. When wind is pressing against the house, hold a single ply of tissue beside the closed door, an inch from the frame, and slide it slowly around the edge, noting every spot where it flutters. In still weather, have a helper shine a flashlight around the perimeter from outside at night while you watch from the darkened hallway, since every sliver of light marks a path air also uses. Run a hand slowly along the edges as well, because a cool stream across the skin is hard to miss. Mark each leak with a small piece of painter’s tape so the fitting stage can move quickly from one confirmed fault to the next. Note the letter slot and keyhole too, and plan brush covers or escutcheon plates for them if they stir the tissue.
Fitting Compression Strips and Foam Tape Around the Frame
Start with the frame sides and top. Pull the old seal away, scrape off adhesive residue with the putty knife, and wash the contact surface with alcohol so the new bond grips clean wood, metal, or paint instead of grime. Let the surface dry fully. Measure each run and cut lengths slightly long, trimming to a neat fit at the corners rather than leaving them short. For foam tape, peel the backing away in short stretches and press the tape into the door stop, the flat surface the door closes against, positioning it so the closed door presses the foam to about half its thickness. Too thin a tape leaves the leak untouched, while overly thick stock strains hinges and latches and can bow a lightweight door over a season. Compression strips with a rigid carrier are screwed or pinned in place, and their bulb or fin should just kiss the door face along the whole run. Work from the top corner down each side, then across the head, checking the door closes and latches after each run rather than at the very end. A door that has drifted out of square may need hardware attention before any seal can work, and advice on adjusting a door that refuses to latch properly covers the hinge and strike plate corrections that restore a tight, even close. Fit the seal to a correctly closing door, never use seal thickness to compensate for a door that will not shut.
Choosing and Installing a Sweep for the Gap Beneath the Door
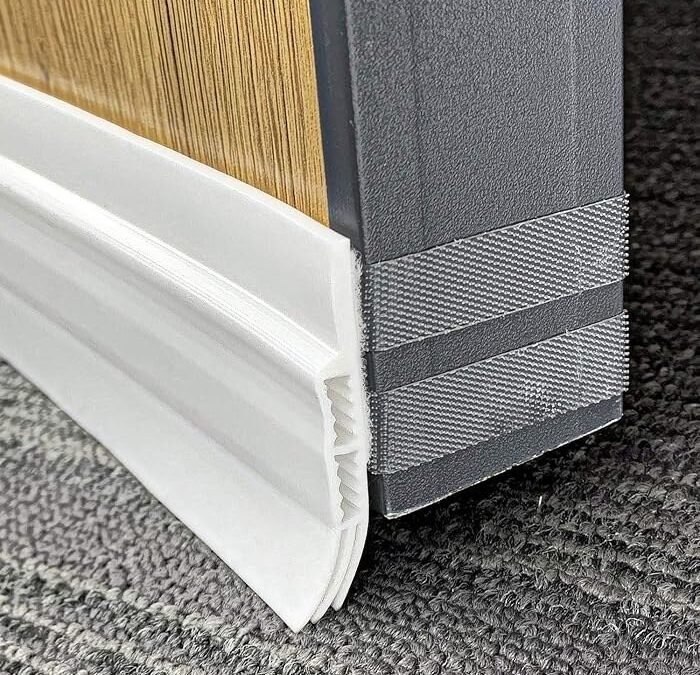
The bottom gap is usually the largest single leak in the doorway, and it needs a sweep rather than tape. Brush sweeps seal uneven thresholds best because their bristles flex over bumps and worn spots, while finned rubber sweeps suit smooth, level sills and shed water well on exposed doors. Measure the door width and the gap height at several points, since floors often slope. Cut the sweep carrier to width with a hacksaw, keeping the brush or fin intact, and hold it flat to the door’s inner surface so the sealing element just grazes the threshold when the door closes. Mark screw positions, drill pilot holes, and fix the sweep loosely at first. Close the door and check the contact from outside with the flashlight, then adjust the sweep down until light disappears without the door dragging hard across the floor. Tighten the screws in sequence from the center outward. On doors that open over carpet, allow a hair more clearance so the pile does not tear the fin within a month. The sweep belongs to a long family of simple barriers, and a background on draught excluders for doors traces how these devices developed and where each style earns its place, bottom seals included.
Screw fixed sweeps are worth their small extra cost over adhesive only versions on any door used many times a day. Adhesive pads soften in summer heat and creep under the repeated sideways tug of opening and closing, while screws hold the carrier exactly where it was set. Where the threshold itself is worn into a dip, a sweep alone may still leave crescent gaps at the ends, and fitting a new threshold or an adjustable sill insert under the sweep restores the flat surface the brush or fin was designed to meet. Treat the threshold as part of the seal, not as scenery beneath it.
Sealing the Outer Frame Joint Where Trim Meets the Wall
Step outside and examine where the frame trim meets brick, siding, or render. Cracks along this joint let air bypass every seal fitted indoors, traveling behind the trim and emerging at the inner frame. Clean loose material from the crack with a stiff brush, and push foam backer rod into any deep section so the bead rests at a controlled depth instead of sinking into the wall cavity. Load the tube, cut the nozzle to a modest opening, and run a steady bead along the joint, moving at an even pace. Smooth the bead using a dampened finger or a sealant tool so it bonds to both surfaces and sheds rain. A reference covering weatherstripping materials and their wider uses sets this joint work in context alongside the moving seals, underlining that a doorway is a system of barriers rather than a single strip of foam. Wipe stray sealant at once, allow the full curing time the tube states, and paint over it later only if the product allows paint.
Testing the Closed Door for Even Compression on Every Side
Finish with proof rather than optimism. Close the door on a sheet of paper at several points around the sides and top, tugging gently each time. Even compression grips the paper with similar resistance everywhere, while a loose spot marks a gap needing thicker material or a small packing piece behind the strip. Repeat the tissue survey on the next windy day and confirm the earlier flutter points have gone quiet. Check the latch as well: the door should click shut with firm hand pressure, not a slam, and the sweep should touch the threshold along its full width without scraping the floor finish. Stand back on the first cold evening and feel the hallway. A sealed doorway changes the character of the space near it, removing the thin river of cold air that used to cross the floor, and that change, backed by the paper test results, is the measure of a job done properly.
Keep the removed packaging and leftover offcuts from each product in a labeled envelope stored near the door tools. When a single section wears or a corner lifts in a later winter, matching the replacement to the original profile and thickness takes minutes, and the envelope notes which thickness went on which side of a door that needed two sizes. That small record turns future maintenance into a short repair instead of a fresh round of measuring, guessing, and buying.


One comment