
Shower grout seldom collapses everywhere at once. One corner line crumbles, a stretch near the drain darkens and softens, and the rest still looks respectable. The full strip out, grinding every joint back to nothing, is a dusty weekend of misery that localised damage rarely justifies. Sound old grout can stay, as long as what is failing comes out and what remains is cut down far enough to give the new material a real grip. Knowing where the shortcut ends is the whole skill here.
Treat the work as five phases in strict order, each finished before the next begins. Reading the old grout comes first, then cutting sound joints down, then packing new grout, then sealing the corners with flexible material, and finally curing and sealing. Skipping ahead is how partial repairs fail. Fresh grout packed into an unprepared joint is decoration, not repair, and it will loosen on a schedule set by the first hot shower.
Phase One: Reading the Old Grout and Deciding What Stays
Inspect with your fingers and ears before any blade comes out. Run a fingertip along every joint and press where the colour changes. Sound grout feels hard, dry and firmly seated. Failing grout powders, crumbles at the edges, feels soft or spongy, or sounds hollow when tapped with a knuckle. Mark each doubtful stretch with tape so the verdict survives from inspection day to working day.
Check the tiles themselves while you hunt. A tile that rocks, clicks or sounds hollow across its whole face may have lost its bond with the wall behind it. Grout cannot rescue a loose tile, and packing fresh material around one only hides the movement that cracked the joint. Press each tile near a damaged joint and watch the edges for any sign of give before blaming the grout alone.
Be honest about dirt masquerading as failure. Some grout only looks failed when it is actually filthy, stained through years of soap film and body oils ground into the surface. Readers unsure which problem they own should learn to clean grout that looks permanently dirty before cutting anything out, because a deep clean is an afternoon while a needless regrout is a weekend. Scrub a small patch first and judge what survives underneath.
Know the point where a partial repair stops being honest. Water behind the wall changes everything. Tiles that move in groups, a wall that feels soft, swelling paint outside the shower, or a musty smell that never leaves all suggest moisture has passed beyond the joints. In those cases complete removal becomes unavoidable, because new grout over a wet, damaged base is a lid on a problem that keeps growing underneath it.
Where damage is local, decide the boundaries generously. Extend each repair a little beyond the visibly failed stretch, into grout that still feels sound, so the new material meets strength at both ends rather than stopping beside the next weak crumb. A repair that ends exactly where failure ends usually restarts there within the year. A short overlap into sound joints costs minutes and buys years.
Phase Two: Cutting Sound Joints Down to a Workable Depth
Preparation decides whether this repair lives or fails, and depth is the heart of it. Damaged joints come out completely, down to a clean base. Sound joints that are staying get cut down by roughly an eighth to three sixteenths of an inch, a good share of their depth, so the fresh grout gains enough body to grip properly. The resources of the Tile Council on tile and grout systems, the North American industry body, set out how these systems are expected to perform, and the principle underneath is constant: new material needs a sound, clean base to key into.
Choose cutting tools to suit the material in front of you. A hand grout saw suits small areas and soft, crumbling joints, and gives you feel through the handle. An oscillating tool with a grout blade covers long stretches faster, though it demands a steady hand near tile edges. A utility knife can shave out softened or rubbery old material where blades would be clumsy. Power without control chips glazed tile, so let patience set the pace.
Control the dust as you work, because grout dust travels everywhere and settles for days. Keep a vacuum nozzle close to the cut, work in short stretches, and wear a mask and eye protection without exception. Tape over the drain so debris cannot wash down into the trap. Wipe the shower out fully between phases; grit left behind now ends up ground into fresh grout later.
Vacuum the opened joints clean and inspect them like a surveyor. The slot should show even depth, firm sides and no loose crumbs hiding at the bottom. Fresh grout spread across a flush, polished or soap filmed surface finds no purchase and soon works loose again, so any joint still glazed or greasy needs another pass. Run a damp cloth along the cuts at the end to lift the last fine dust away.
Phase Three: Packing New Grout Into a Prepared Joint
Mix the grout to the consistency its maker states, in small batches you can use while it stays workable. Too wet, and the finished joint shrinks, weakens and washes pale. Too dry, and it will not pack into the depth you worked to create. Let the mixed material rest briefly as directed, stir it once more, and resist adding extra water later when it stiffens; discard a batch that has gone past working instead.
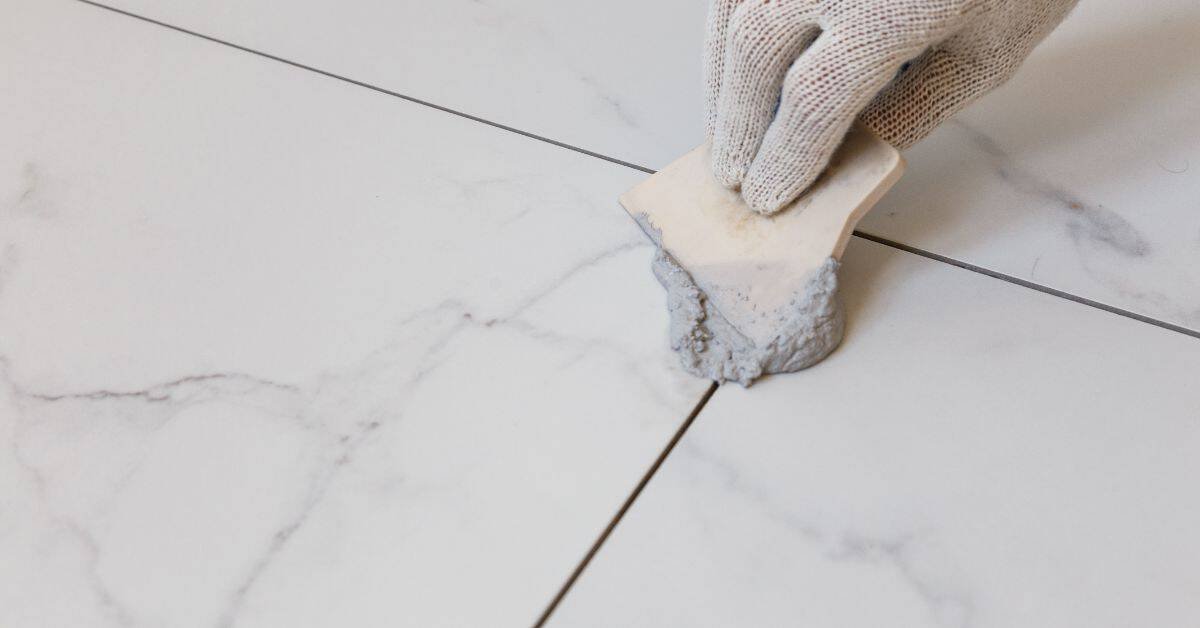
Pack firmly, because the depth is worthless if the grout merely bridges across the top of it. Load a grout float and press material diagonally into each joint, pushing from several angles so the slot fills completely without air pockets. Work in a modest area at a time. Grout that skins over before it is packed leaves a hard shell over a hollow joint, an arrangement that fails early and puzzles its owner.
Tool the joints once they are filled, drawing the float edge or a shaping tool along each line to compact the surface and leave a consistent profile. A slightly recessed, even joint sheds water better than a proud, smeared one. Keep the faces of the tiles as clean as you go. Every smear removed while soft is a minute of haze work saved after the grout hardens.
Time the wash off with care. Wait until the grout in the joints has firmed enough to resist a damp sponge, then wipe the tiles with that sponge rinsed often in clean water. Too early, and you drag material out of the joints. Too late, and the film sets into a stubborn haze that needs a dedicated haze remover and patient rubbing the following day. Finish by buffing the tiles with a dry cloth once the haze lifts.
Phase Four: Corners Get Flexible Sealant, Never Rigid Grout
Clear grout out of the corner joints entirely, because corners play by different rules. The junction where a tub or tray meets the wall is a change of plane. The two surfaces move independently, expanding, flexing and shifting by small amounts as weight and temperature change. Rigid grout bridging that junction cracks there repeatedly, no matter how carefully it was packed, because it was never designed to stretch.
Replace the corner material with flexible silicone sealant matched to the grout colour. Cut away every trace of old grout and failed sealant from the junction, clean the surfaces until they are dry and free of soap film, and mask the edges with tape if your hand is not yet steady. Sealant bonds to clean, dry surfaces and lets go of greasy ones, usually within the first season of showers.
Apply a steady bead and smooth it once, with a wet fingertip or a shaping tool, then leave it alone. Repeated smoothing tears the skin and traps folds that split later. Fill the tub with water or weight it as the maker directs while the sealant cures, so the joint sets in its working position rather than its resting one. Peel the tape while the bead is still fresh for the cleanest edge.
Phase Five: Curing Time, Sealing and the First Shower Back
Curing is a phase, not an afterthought, and water is its enemy. The encyclopedia entry on grout and how cement grouts cure sets out how these materials harden over time, gaining strength as they cure rather than merely drying out. Follow the stated curing time on your product before any water exposure. Typical cement grout needs at least a day or two, and some products ask for longer. A shower taken early can wash strength out of a joint permanently.
Keep the room dry while the clock runs. Run the extractor fan during and after any unavoidable use of the room, open a window where weather allows, and keep towels and dripping bath toys out of the repaired area. Light, moving air helps surfaces stay dry without disturbing the joints. Postpone baths that splash the walls, and tell everyone in the house the date the shower returns to service.
Seal only after the cure is complete. Grout sealer applied too early traps moisture inside the joint, and the sealer itself then needs a drying window of its own before water tests it. Brush or wipe the sealer along the joint lines rather than flooding the tiles, wipe away any excess from glazed faces, and let the room rest again for the period the product states. Two patient waits, properly kept, protect all the earlier work.
Ease the shower back into service rather than testing it with the longest, hottest session of the year. Begin with ordinary use, then inspect the joints after the first few showers while they are still new enough to correct. Look for pinholes, soft spots or corners lifting at an edge. A pinhole filled now, while everything is clean and dry between uses, takes minutes and disappears into the repair.
Carried through in order, a partial regrout asks for care rather than heroics. Sound grout stays, failing grout goes, fresh material sits deep in clean slots, corners flex as corners must, and curing time is honoured in full. The result is not a patched look but a quiet one: joints that read as a single, even surface again, and a shower returned to daily work with years of service in front of it.
Keep a short note of the grout colour and product you used, stored with the leftover dry material in a sealed jar. A future chip or a single failed stretch can then be matched without guesswork, and a small repair years from now stays invisible instead of starting the whole colour search again.


