
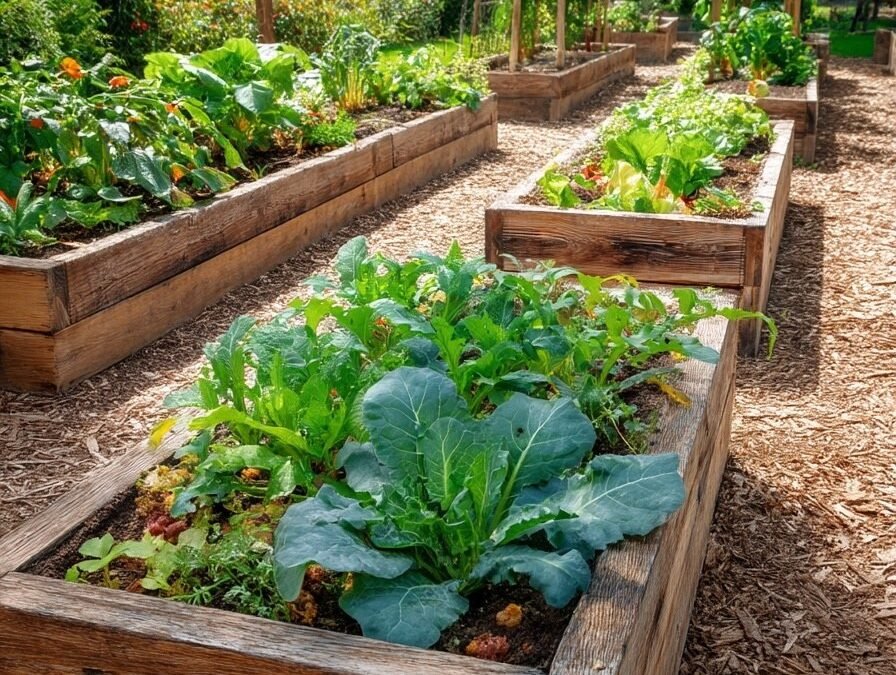
A raised bed succeeds or fails long before seeds go in, because the frame size, the soil blend inside it, and the sunny spot chosen decide almost everything that follows. Getting those early choices right turns a pile of boards into years of easier growing. The short answer for a first bed is reassuring. A simple rectangular frame of boards, corner posts, and screws can be assembled in an afternoon by one person with basic tools, and a bed around four feet wide and eight feet long suits most gardens and most lumber lengths. What the bed needs before any seed is a level patch of ground in strong sunshine, a frame material that will not rot away in two seasons, and a loose filling rich in compost that will settle without turning into a dense slab. None of that demands special talent. It demands decisions made in the right order, because moving a filled bed is heavy, miserable work, while moving an empty frame takes minutes.
How Long Does Assembling a Simple Raised Bed Frame Usually Take?
For a plain four sided frame, allow roughly two to three hours from stacking the boards to standing back with a finished box, and less once a second bed repeats the same cuts. Pre cut lumber from a yard that will saw boards to length can shorten the job further, leaving mainly screwing and squaring. The frame itself is simple carpentry. Cut the long sides and short ends, fix them to corner posts with exterior screws, check the diagonals match so the rectangle is truly square, and carry the frame to its spot before filling, because even an empty frame grows awkward once soil enters the picture. Site preparation can add time and should not be rushed. Grass under the bed can be lifted as turf, covered with plain cardboard to smother it, or left in place beneath a deep fill, depending on the crop and the gardener patience. Ground that slopes needs attention first, since a frame sitting on a slope holds soil unevenly and drains toward its low corner, and anyone dealing with levelling an uneven lawn will recognise the same digging, filling, and checking rhythm. Before any digging at all in the United States, call the free service reached by dialing eight one one, which arranges for buried utility lines to be marked, so a spade never meets a cable or pipe by surprise. That call costs nothing and can save a great deal.
Why Does Bed Width Matter More Than Bed Length for Gardeners?
Length is mostly a matter of space and lumber. Width governs how the gardener body works for the whole life of the bed. A bed about four feet wide lets most adults reach the centre from either side while kneeling or standing on the path, which means planting, weeding, and harvesting happen without anyone stepping onto the soil. That rule protects the very thing a raised bed exists to provide. Loose, airy soil lets roots push through easily and lets water drain at a steady pace, while a footstep squeezes out the air pockets and compacts a patch that plants then struggle to use. Beds against a wall or fence follow a different limit, since access comes from one side only, and those should stay nearer two to three feet wide so the back row remains reachable. Gardeners with limited mobility sometimes choose narrower or taller beds for the same reason. Reach decides comfort, and comfort decides whether the bed gets tended weekly or quietly abandoned by midsummer. Anyone reading a raised bed gardening overview covering its development and methods will see the same theme repeated across styles and countries: the growing area is lifted and protected, and the gardener works from outside it. Make paths wide enough for a wheelbarrow and a kneeling pad while planning widths, because a beautiful bed hemmed in by a narrow gap becomes an irritation every single visit.
Which Lumber and Alternatives Resist Rot Season After Season?
Wood choice balances price, lifespan, and peace of mind around food crops. Cedar and redwood sit at the reassuring end of the scale. Both carry natural oils that slow decay, both look handsome as they weather to grey, and both cost more at the till than ordinary softwood. Modern pressure treated lumber sits at the practical end. Current preservatives are considered acceptable by regulators around vegetable growing when the timber is handled and used as directed, and treated boards often outlast untreated softwood by many seasons at a friendlier price. Untreated pine or spruce is the budget route, honest and easy to work, with the understanding that boards may soften and need replacing after a handful of years, which some gardeners accept as a fair trade for a cheap start. Thickness matters as much as species. Sturdy boards resist bowing outward under the pressure of wet soil, and corner posts anchored firmly keep joints tight. Alternatives deserve a look as well. Stone, brick, and concrete blocks last almost indefinitely and suit permanent beds, though they cost more effort to build and cannot be moved. Galvanised metal kits arrive ready to assemble, shrug off rot entirely, and warm quickly in spring sunshine, which can help early crops and can also dry soil faster in hot spells. Old railway sleepers and tyres are best avoided around food, since their past treatments and contents are uncertain. Whatever material wins, line nothing with plastic sheet inside the frame unless drainage has been thought through, because trapped water undoes the drainage advantage the bed was built for.
What Soil Blend Fills a New Bed Without Sinking Too Fast?
Filling a deep frame with pure topsoil alone often disappoints. It can pack down, drain poorly, and carry few nutrients, while pure compost is rich but shrinks dramatically as it breaks down. A balanced blend used by many gardeners combines topsoil for body, compost for nourishment and microbial life, and an aeration ingredient such as perlite or coarse bark to keep the mix open. Roughly equal attention to all three parts beats any magic ratio, and the quality of the compost matters more than fine tuning the proportions. Homemade compost brings a particular advantage, since its contents are known, and the environmental agency guidance on composting at home explains how kitchen and garden waste becomes that dark, crumbly material safely. Fill the bed in layers, watering each layer lightly as it goes in, which settles the mix gently and reveals the true level before plants arrive. Expect noticeable settling during the first season regardless of care, because organic matter naturally breaks down and air pockets collapse. Buying or reserving extra blend for topping up is therefore wise rather than pessimistic. Avoid soil dug from a garden patch treated with long lasting weedkillers, and be wary of very cheap bulk mixes heavy with undecomposed wood, which can rob nitrogen from young plants while it finishes rotting. A handful of good fill should feel loose, smell earthy rather than sour, and hold together briefly when squeezed before crumbling apart.
Where in the Yard Will Vegetables Get Enough Daily Sunshine?
Most vegetables want a generous stretch of direct sun each day, and fruiting crops such as tomatoes, peppers, and squash are the greediest of all. Watch the chosen patch across a full day before building, noting where fences, trees, and the house itself throw shade in the morning and again in the evening, and remember that shadows lengthen in spring and autumn when the sun sits lower. A spot that looks bright at noon in midsummer may spend half of April in shade. South facing ground in northern regions gathers the most light, but convenience counts too. A bed near the kitchen door gets watered, picked, and weeded far more faithfully than a perfect bed at the far end of a long garden, and a nearby tap or water butt removes the daily burden of hauling cans across the lawn. Shelter helps more than many beginners expect. A site blasted by constant wind dries soil quickly and batters young stems, while a fence or hedge that breaks the wind without stealing the sun gives plants a calmer life. Keep beds away from large thirsty trees where possible, since roots will find the rich moist soil and compete with the crops for water and food. Finally, leave room to expand. One successful bed has a way of becoming two, and a layout that allows a matching frame beside the first, with a sensible path between them, saves redesign work later.
How Should a Freshly Filled Bed Be Watered and Settled?
The first watering is a settling exercise as much as a drink. Give the filled bed a slow, thorough soaking, let it drain, then soak again, watching the level drop as air escapes and particles nestle together. Top up any hollows with reserved blend before planting, and repeat the light watering until the surface stays even. After planting, water deeply and less often rather than sprinkling a little every day, because deep watering encourages roots to grow downward into the bed where moisture lasts, while constant light sprinkling keeps roots near the surface and leaves plants vulnerable in a hot spell. Morning watering suits most gardens, giving leaves time to dry before evening and reducing the damp conditions that fungal problems enjoy. A mulch of straw, shredded leaves, or compost spread over the surface once seedlings are established slows evaporation, softens the impact of heavy rain, and keeps soil temperature steadier. Check moisture with a finger pushed into the mix rather than trusting the look of the surface, which can appear dry while the soil a little lower remains nicely damp. Raised beds drain freely by design, so during dry weeks they need checking more often than ground level plots, especially in windy weather. By the end of the first season, the routine becomes habit: water, watch the level, top up as the bed settles, and enjoy how much easier every one of those tasks feels at waist height.
How Much Space Should Separate One Bed From the Next?
Leave enough room to kneel, turn a wheelbarrow, and carry a watering can without brushing past wet foliage all summer. A path around the width of a barrow, kept simple with grass, slabs, or wood chip, keeps access comfortable and stops the gaps between beds turning into muddy channels after rain.
When Does a Bed Need Fresh Mix Added on Top?
Top up whenever the surface has dropped noticeably below the frame edge, most often at the end of the first season and then lightly each year. A fresh layer of compost spread over the top in autumn or early spring feeds the bed, replaces what broke down, and saves the gardener from digging and disturbing the soil structure below.


One comment