
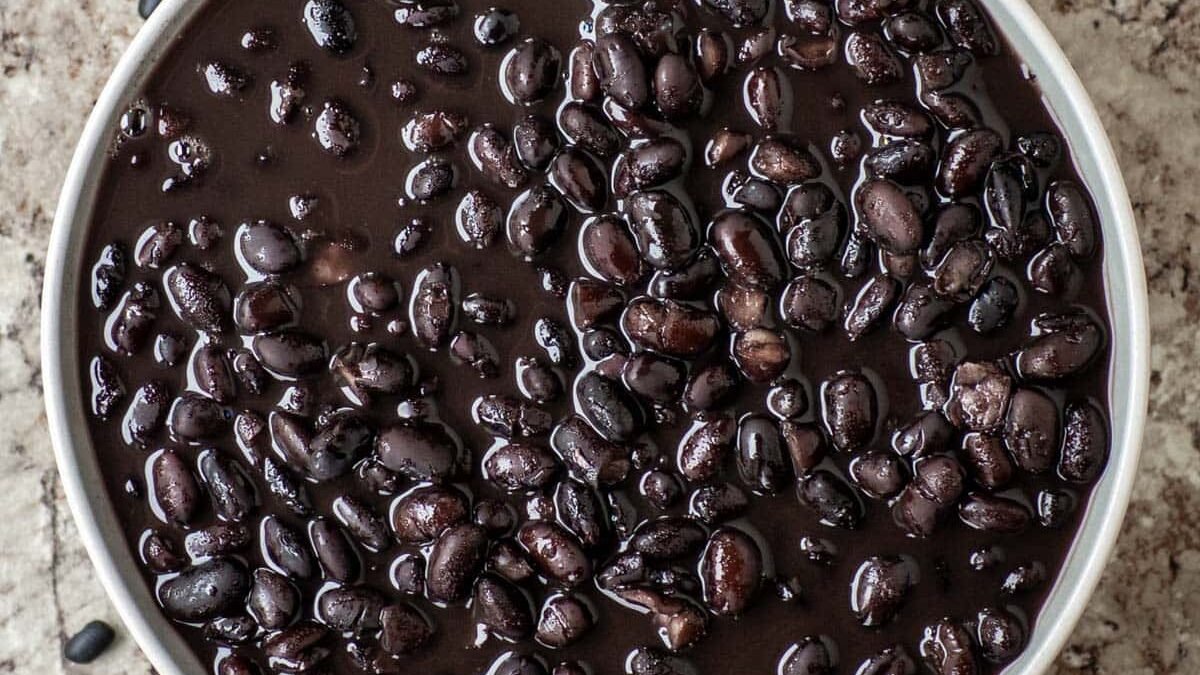
A humble bag from the dry goods shelf quietly undercuts the canned aisle by a wide margin, and the pot on your stove already knows how to handle it. No specialist cooker is required, only water, patience, and respect for a couple of timing rules. What follows is the honest arithmetic plus the two relaxed methods that deliver creamy results.
Dried beans ask for planning rather than skill. They need water and time, both cheap, and they repay that patience with texture no can quite matches: skins intact, centers creamy, and cooking liquid worth saving for soup. That saved liquid points naturally toward homemade soup stock for bean soups later in the week, when a pot of beans becomes the base for several different meals instead of a single side dish.
What a Bag of Dried Beans Really Delivers Per Serving
Start with the arithmetic, stated without any currency name as promised by the numbers themselves. A bag weighing one pound runs about two in most shops. Cooked, that same bag swells into roughly six to seven cups of beans. Divided into half cup servings, each serving lands near twenty to thirty. Buy the equivalent amount already cooked in cans and each serving generally lands between sixty and a full one, often with added sodium and a noticeably firmer, sometimes chalky texture.
Put another way, one modest bag replaces about four to five cans on the shelf. A household eating beans twice a week can keep well over one hundred a year simply by choosing dried over canned, before counting any savings from buying in larger bags or from shops with rapid turnover. The gap widens further with chickpeas and black beans bought in bulk, and narrows only slightly with small, expensive packets from specialty shelves.
For general background on varieties and their place in cooking, see this overview of beans as food covering legumes eaten around the world. Beans deliver protein, fiber, iron, and folate together, which is why they anchor so many inexpensive cuisines. Few other ingredients at this price per serving can carry a soup, fill a burrito, bulk out a salad, and blend into a dip across a single week without repeating a flavor.
Buy from a source that sells beans quickly. Old stock is the hidden villain in many disappointing pots, because beans dried for a very long time resist softening no matter how patiently they simmer. If a bag has no date and the shop looks slow, choose a different bag elsewhere. Fresh dried beans, an odd phrase that proves true in practice, cook evenly, split less, and reach creaminess within the timings given below.
Soaking Choices and What Each One Changes in the Pot
An overnight soak in plenty of cold water remains the gentlest route. Beans absorb water slowly, plump evenly, and then finish cooking in less time, with the simmer shortened by roughly a quarter to two fifths. Even cooking is the larger prize: fewer beans stay chalky at the center while others burst. Cover the bowl generously, because beans expand a great deal, and leave it somewhere cool overnight.
A quicker route captures much of the same benefit when you forget the night before. Bring beans and water to a brief boil, turn off the heat, cover the pot, and let them rest for about an hour. Drain, rinse, and proceed as if soaked overnight, adding a little extra simmer time if needed. This method suits a weekend afternoon cook, when an hour of resting fits easily between lunch and an evening meal that uses the beans.
Skipping a soak entirely also works for most varieties. Expect a longer simmer, roughly half an hour to three quarters of an hour extra, and expect a few more split skins along the way. For soups and refried preparations where appearance matters little, no soak cooking is perfectly respectable. Lentils and split peas need no soaking under any method; they soften in around twenty to thirty minutes and can go straight from bag to pot on a busy night.
Empty the soaking bowl, rinse the beans well, and start them in clean water so flavors stay bright, especially with dark beans whose soaking liquid turns murky and strong tasting. Some cooks salt the soaking water, believing it seasons and helps skins stay supple; others keep soaking plain and season later. Either approach produces good beans provided the cooking itself is gentle and the final seasoning is assertive. The soak is a tool for timing and texture, not a moral test.
A Gentle Stovetop Simmer That Needs Almost No Attention
Place soaked beans in a heavy pot, cover with fresh water rising a couple of inches above their surface, and add aromatics such as several garlic cloves, a bay leaf, and an onion cut in half, perhaps with a dried chili or a strip of citrus peel. Bring the pot to a boil, skim foam that rises in the first minutes, then lower the heat until the surface barely trembles. A violent boil batters beans against one another and splits skins; a calm simmer keeps them whole.
Timing varies by variety and soak. Black beans and pinto beans often take about an hour to an hour and a half unsoaked, less when soaked. Chickpeas sit at the long end and reward patience with a firm bite that holds up in salads. Test several beans from different parts of the pot before deciding, because a single tender bean can mislead. Done beans crush easily between tongue and palate with no gritty core remaining inside.
Red kidney beans require one firm safety rule that overrides gentleness at the start. Food safety authorities say a natural toxin present in these beans must be destroyed by a full rolling boil of at least ten minutes, a point detailed in the reference on the kidney bean toxin and safe preparation for home cooks. For that reason, dry kidney beans should never go straight into a slow, gentle cooker that may never reach a true boil. Boil them hard first, then simmer as calmly as you like.
Check the water level once or twice and top up with hot water if beans peek above the surface. Exposed tops cook unevenly and stay firm. Keep the lid ajar rather than sealed tight, which steadies the simmer and prevents boiling over. Near the end, let the beans rest in their hot liquid for a short while off the heat; they finish absorbing seasoning and their texture settles into the creaminess canned beans rarely achieve.
The Covered Oven Route for Completely Hands Off Cooking
Oven cooking suits cooks who dislike watching a pot. Combine soaked beans, fresh water to cover by a couple of inches, aromatics, and a little oil in a lidded oven safe pot. Bring it to a boil on the stove first, which matters both for speed and, with kidney beans, for the safety boil described earlier. Then cover and transfer to a moderate oven where the surrounding heat cooks evenly from every side at once.
Expect roughly one to two hours in the oven depending on variety, soak, and how tender you like the result. The great advantage is stability: oven heat does not create a hot spot on the base, so scorching is unlikely and stirring is unnecessary. You can roast vegetables, bake bread, or simply leave the kitchen while supper quietly takes care of itself in a way a stovetop pot should never be left to manage alone.
Salting, Acids, and Seasoning Without Tough Skins
Old advice warned that early salt toughens beans beyond rescue. Modern kitchen testing paints a calmer picture: salting the cooking water seasons beans throughout and does not prevent softening for most cooks, though adding the bulk of the salt near the end remains a safe habit when a pot has been slow. Taste late and salt decisively; under seasoned beans taste flat no matter how creamy their texture, and no table salt shaker fully repairs that.
Acids are the ingredient that genuinely slows softening. Tomatoes, vinegar, wine, and citrus juice firm bean skins and extend cooking time if they enter the pot early. Build the bean first, confirm tenderness, then add acidic components and simmer briefly so flavors marry without undoing the texture you waited for. A tomato based chili, for example, should receive its tomatoes after the beans have already turned tender in plain, aromatic water.
Beyond salt, beans welcome bold seasoning once tender. A spoonful of good oil, a squeeze of lemon at serving, chopped herbs, ground cumin, smoked paprika, or a grating of hard cheese can each steer the same pot in a different direction. The cooking liquid itself, seasoned well, becomes part of the dish rather than something to drain away thoughtlessly. Save at least some of it whenever you drain beans for salads.
Storing a Big Batch and Putting It to Work All Week
Cool cooked beans in their liquid and refrigerate them in sealed containers, where they keep well for about five days. Stored in liquid, they stay plump and seasoned; drained and stored dry, they firm up and lose appeal faster. Freeze portions in flat containers or bags for several months, ideally in amounts matching how you cook, such as a can sized portion for a soup or a larger portion for a family chili night.
A big batch earns its keep through variety across the week. Turn one portion into a soup, another into burrito filling, another into a salad with chopped vegetables and a sharp dressing, and blend chickpeas, if that was your batch, into a smooth dip with lemon and garlic. Refried style beans need only a hot pan, a little fat, onion, and a masher, plus enough cooking liquid to reach the softness your household prefers at the table.
Label frozen portions with the variety and cooking date. Black beans and kidney beans look deceptively alike under frost, and lentil soup and bean soup freeze into similar blocks. A piece of tape and a pen save guessing later. Thaw in the refrigerator overnight for best texture, or warm gently from frozen in a covered pot with a splash of water, stirring occasionally so the center heats through evenly.
Once the rhythm settles, cooking beans stops feeling like a project. Soak a bag while you sleep or while you work, simmer or bake it with almost no attention, season it properly, and store it in useful portions. The savings repeat every single week, the texture beats the canned alternative, and a shelf of humble bags quietly becomes one of the most reliable foundations in the whole kitchen, ready whenever a meal needs substance.


One comment