A plain pot can turn out separate, tender grains, yet many batches end up sticky, scorched or still hard in the centre. The fault is seldom the rice itself. Too much water, a loose lid, constant peeking and serving before the grains have rested all push a simple staple toward porridge or crunch. Rinsing away loose surface starch, measuring with care and leaving the pot alone while steam finishes the work change the result completely. What follows is a checklist first, then the reasoning behind each item, plus fixes for the failures home cooks meet most often at home.
The Checklist Before the Lid Goes On
- A heavy pot with a lid that sits flat and close, with no wobble and no warped rim.
- Rice scooped level rather than heaped, then rinsed until the rinse water looks nearly clear.
- Water measured to match the rice, by the proportions in the next section, not poured in by eye.
- A timer you trust, so the simmer and the rest are timed rather than guessed.
- The heat set low enough for a lazy simmer once the lid goes on.
- A fork kept ready for fluffing at the end, and the patience to leave the pot shut until then.
That short list carries nearly the whole method. Most failures can be traced back to one item on it. A lid that leaks steam behaves like extra cooking time lost and water gone that the grains were counting on. Rice measured by a hurried scoop can be well over or under what the water was measured for. A simmer that boils hard drives water out and batters the grains against each other, while one that barely moves leaves the centre chalky. None of these faults needs new equipment to fix. Each one needs a moment of care before the heat goes on, which is why the checklist sits at the front.
Work through the list in order the first few times you cook this way. Soon it becomes habit, the way checking a pan is hot before eggs becomes habit, and the pot starts turning out the same good result without close watching.
Rinsing and Measuring for Separate Grains
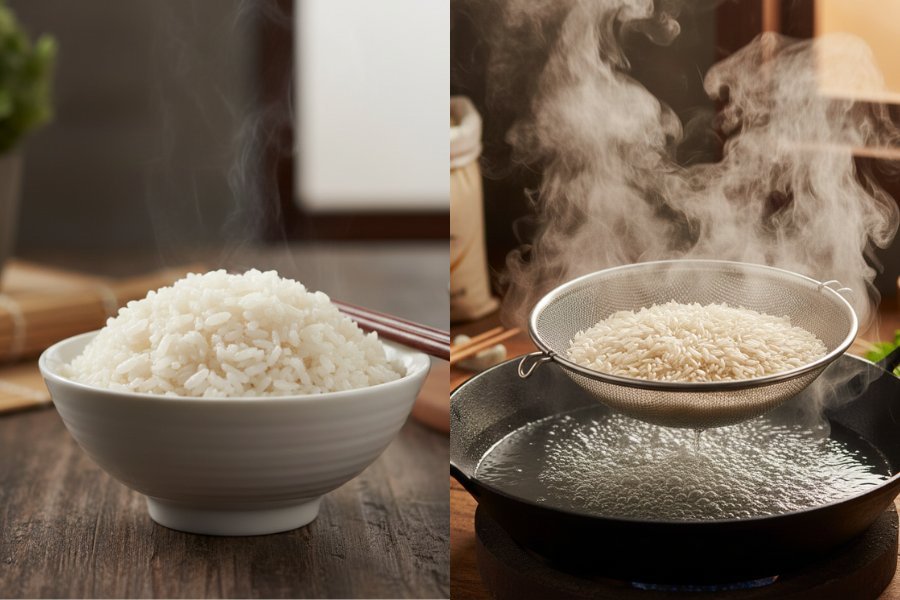
Dry rice carries loose starch on its surface, dust left from milling and handling. Left in place, that starch thickens the cooking water into a light glue, and the grains stick to each other and to the base of the pot. Rinsing washes most of it away. Put the rice in a bowl, cover it with cool water, swish it gently with a hand, and pour the cloudy water off. Repeat until the water stays mostly clear. Work gently, since rough scrubbing cracks grains, and cracked grains cook unevenly and turn soft at the edges while their centres lag behind.
There is a small exception worth knowing. Rice that has been enriched or treated so its surface carries added nutrients loses some of that coating when rinsed hard, and some cooks prefer a single gentle rinse for such rice. For everyday long grain rice, though, a proper rinse is the single easiest step toward separate grains.
Measuring is the other half of this section. For long grain white rice cooked under a lid that seals well, a sound starting point is one part rice to somewhere between one and a quarter parts and one and a half parts water, by volume. Long, slender grains such as basmati sit at the lower end of that range and reward a short soak before cooking, which lets them take up water evenly and stretch without splitting. Basmati earns its place at the table because, handled well, its grains stay distinct, and fragrant long grain rice of the jasmine kind sits slightly higher in the range and gives a softer, gently clinging result suited to serving alongside stir-fried dishes.
Short and medium grain white rice wants roughly equal parts rice and water, sometimes a touch more, and is meant to finish tender with grains that hold together lightly rather than falling apart from each other. Treat those proportions as honest ranges, not promises. Stoves differ, pots differ, and lids differ, so one test batch cooked with care, and adjusted slightly the next time, teaches more than any printed ratio can.
Simmering Untouched and Resting Off the Heat
Bring the pot to a boil with the lid off so you can see it arrive, then stir once, put the lid on, and turn the heat down to the lowest setting that keeps a gentle simmer alive. From that moment, the pot is closed business. Lifting the lid lets out the steam the top layer of grains needs to finish, and each peek costs heat that the low burner replaces slowly. Stirring is just as unhelpful. It breaks grains, frees more starch into the water and turns a pot that was heading for separate grains into one heading for porridge.
Long grain white rice usually needs somewhere in the region of fifteen to twenty minutes at that low simmer. When the time is up, take the pot off the heat entirely and leave it, still covered, for around ten minutes more. This rest is not idle time. Steam trapped in the pot evens the moisture out, so the wetter grains near the top and the drier grains near the base meet in the middle, and the surface firms enough to fluff cleanly instead of smearing.
Rested, separate grains are exactly what a good home stir-fry is built on. Plain pot rice is the natural base under a takeout-style dish, and grains cooked this way carry a budget stir-fry that needs plain cooked rice without turning soggy under the sauce.
It is worth remembering what the staple under that sauce actually is. As the reference material puts it, rice, as described in the entry on rice, is the seed of a grass species and a staple food for a large part of the world, which is why so many home methods across so many kitchens rest on this same simple pattern of measured water, sealed steam and patience.
Fluff at the end with a fork, lifting and turning rather than stirring, and serve from the top down. If a few grains cling to the base in a pale golden layer, that layer is a treat in many kitchens rather than a failure, provided it tastes toasted and not burnt.
Adjusting for Brown and Short Grain Rice
Brown rice asks for more of both water and time, and the reason sits on the grain itself. As explained in the reference entry on brown rice, the grain keeps its bran and germ layers, and those outer layers slow the water on its way in. Milled white rice has had them removed, so it drinks quickly. Brown rice needs somewhere around one and three quarter parts water to one part rice, and a simmer closer to forty minutes, sometimes a little longer, followed by the same covered rest.
Rinsing still helps brown rice, though the water will never run as clear as it does with white rice, and that is fine. Judge the rinse by feel rather than by chasing perfectly clear water. A soak can shorten the simmer slightly and gives a more even result, especially with older rice that has dried out in storage. Keep the lid discipline exactly the same. Brown rice forgives a peek less than white rice does, because its longer cooking time means more steam lost each time the lid lifts.
Short grain rice for dishes where a gentle stickiness is wanted follows the white rice method with roughly equal water, a slightly shorter simmer and the same rest. The rest matters even more here, because short grains finish fragile and tear if fluffed hard while wet. Use a flat paddle or a fork with a light hand, folding rather than mixing. For sushi-style uses, season only after the rest, while the grains are still warm and able to take the seasoning evenly.
Wild rice, which is not true rice at all but the seed of a water grass, needs far more water and far longer, and is best cooked by the pasta method in plenty of water and drained. It sits outside the measured pot method above, and forcing it into that method is a common cause of disappointment.
Rescuing Mushy Scorched or Crunchy Batches
Mushy rice usually means too much water, too long at a rolling boil, or both. All is not lost. Spread the rice in a thin layer on a wide tray so steam escapes and the grains firm up as they cool slightly, then serve it under something with texture, in fried rice the next day, or folded into soup where softness is no fault. Next time, measure the water down a little and check that the simmer is gentle rather than vigorous.
Scorched rice gives a burnt smell from the base while the top may be perfectly good. Do not stir. Stirring mixes the burnt layer through the whole pot and ruins all of it. Lift the good rice off the top with a fork, moving it to a clean bowl, and leave the dark layer behind. If the burnt taste has crept upward, a slice of plain bread rested on the surface for a few minutes can draw out some of the smoky smell, though it will not save rice that is burnt through.
Crunchy rice, hard in the centre of each grain, means the water ran short or the steam escaped. Add a small splash of hot water over the top, replace the lid tightly, and give the pot a few more minutes over the lowest heat followed by another short rest. Check the lid fit as well. A warped lid on an otherwise good pot explains many repeat failures, and a clean folded cloth under the lid can seal the gap while you cook.
Wet rice with standing water at the end points to a simmer that was too low, undercooked grains, or rice added to water that never truly boiled. Drain what you can, return the pot to the lowest heat with the lid slightly ajar for a few minutes so the excess steams away, then rest it covered. Keep notes on which failure you met and what you changed. Two or three noted batches will settle the exact proportions for your stove and your pot, and from then on plain pot rice becomes one of the most reliable things you cook.