
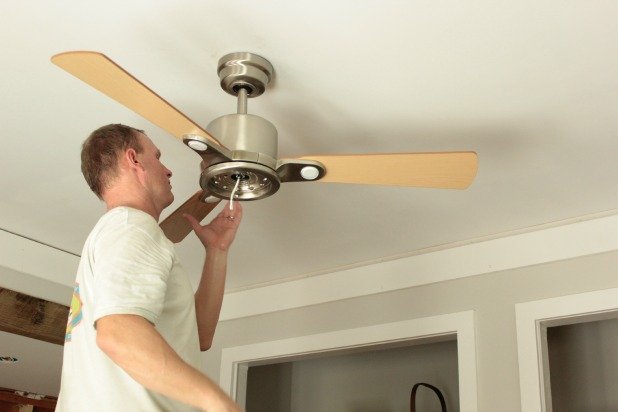
Overhead air movement can transform a stuffy bedroom, yet the fitting above you must stay secure while spinning for years. Confidence comes from respecting support, wiring, and balance before admiring the result from below. Work slowly, keep power isolated throughout, and treat every connection as worth checking twice. A patient afternoon leaves a quiet, steady fan and a room that feels far more comfortable. That patience matters more than speed at every stage, because a fan combines weight, motion, and household current in a single fitting, and each of those elements deserves calm attention rather than hurried optimism.
Gathering Materials and Safety Gear Before Touching Wiring
Start by laying out everything within easy reach so no one climbs down mid task hunting for a forgotten tool. You will want a sturdy ladder with level footing, screwdrivers suited to the fittings, wire connectors that match the conductors in the ceiling, electrical tape, a non contact voltage tester, and the hardware supplied with the new unit kept together in a shallow tray. Add safety glasses for work overhead, a dust mask for old ceiling debris, and a headlamp or portable light that runs without mains power, since the circuit will be off while you work. Read the manufacturer instructions fully before opening any packaging, noting the order the maker expects and any parts that must be assembled on the floor rather than overhead.
Steady operation after installation depends on choices made at this early stage, because loose mountings and uneven blades create movement that grows louder and more damaging over time. Studying reliable wobbly ceiling fan fixes before you begin helps you recognise which details protect comfort and safety alike, from bracket tightness to blade alignment. Keep a small notebook nearby and record wire colours as you find them, the position of any existing switch wiring, and the condition of the ceiling box, because clear notes prevent guesswork once the old fitting is down and memory starts to blur.
Choose a fan sized for the room rather than for appearance alone, with blades proportioned to move air across the whole space without crowding walls or light fittings. Check ceiling height as well, since low rooms may need a close mounted design while taller rooms benefit from a drop rod that brings moving air closer to where people sit and sleep. Confirm every packaged part is present and undamaged, lay blades flat so they cannot warp, and keep screws sorted by stage. If anything in the box looks bent, cracked, or incomplete, pause and replace it rather than hoping motion will somehow hide a defect once the fan is spinning overhead.
Step One: Confirming Support and Cutting Power at the Breaker
Support carries the entire job. A ceiling fan needs a mounting box specifically rated for fan support, fixed firmly to structural timber, and an ordinary light fitting box must never be trusted with the extra weight and vibration. Look for clear rating markings on the box itself after the old fitting is lowered, and test for movement by hand without forcing anything. A brace that spans between joists, or a box screwed directly into solid framing, gives the firm anchor the motor demands. When attic access exists, inspect from above as well, confirming fixings bite into timber rather than plaster alone.
Power isolation comes before any wire is touched. Switch off the correct breaker at the panel, not merely the wall switch, then apply tape or a clear note so nobody restores power while work continues. Test at the ceiling with the voltage tester, and also test at the wall switch, treating every conductor as live until your own check proves otherwise. The United States Consumer Product Safety Commission advises that electrical products and installations should follow recognised safety standards and manufacturer instructions, and that principle applies to every stage here. If support looks doubtful, wiring looks altered, or a new circuit seems necessary, stop and bring in a licensed electrician, since uncertainty overhead is never a saving.
Photograph the existing wiring before disconnecting anything, with colours and positions clearly visible, and keep the images open on a phone or printed sheet as you proceed. Note whether separate switching exists for light and fan, whether a remote receiver sits in the canopy, and whether any conductor shows heat damage or brittle insulation. Damaged cable ends, scorched connectors, or crumbling sheathing all change the scope of the work and belong in professional hands. A careful survey at this point costs little time and prevents the far worse outcome of discovering a problem after the motor is already hanging from the bracket.
Step Two: Removing the Old Fitting and Preparing Connections
Lower the old fitting slowly, supporting its weight while the final screws come free, and never let it dangle from its wires even briefly. Separate conductors gently, straighten ends that will be reused, and cap any exposed conductor while you prepare the new mounting. Clean dust from the ceiling opening, check that cable entry points have proper protection against sharp edges, and confirm the new bracket sits flush without rocking. Small gaps and tilted brackets transfer directly into noise and movement later, so correct the seating now while access is easy and nothing heavy hangs below.
Background reading helps frame what the finished fitting should do once installed. The Wikipedia entry on ceiling fans describes such a fan as a device typically powered by electricity that uses rotating blades to circulate air within a room, and that plain description captures the whole purpose of the work. The same source notes that fans can rotate in a direction that pushes air downward for cooling or upward to redistribute warm air gathered near a ceiling, which is why direction settings matter after fitting. Keep that dual role in mind while preparing connections, because correct switching and control wiring preserve both seasonal benefits.
Prepare each conductor exactly as the manufacturer directs, with insulation stripped only to the length the connector needs and strands kept neat rather than splayed. Match colours carefully according to the wiring diagram for your region and model, keeping ground connections secure and unmistakable throughout. Tug test every joined connection firmly once made, since a wire that slips free inside a closed canopy can cause flicker, heat, or complete failure. Route cables so they sit comfortably inside the box without pinching against metal edges, and leave enough room for the receiver unit if the design uses one, without cramming components together.
Step Three: Mounting the Motor and Joining Wires Securely
Assemble as much of the motor unit as the instructions allow at floor level, where handling is easier and small parts are less likely to drop. Fit the drop rod or close mount hardware, thread wiring through hollow parts in the intended order, and tighten each mechanical joint fully before lifting anything overhead. Use the bracket hook or a helper to carry the motor weight while connections are made, rather than balancing the unit on a ladder rung or against your shoulder. Overhead work tires arms quickly, and a supported motor allows both hands to stay free for careful wiring.
Fix the mounting bracket to the rated box with the screws supplied for that purpose, checking that the bracket cannot twist under firm hand pressure. Hang the motor, join wires colour to colour as the diagram specifies, and fold conductors neatly into the available space as the canopy rises. Keep connectors oriented so they will not press against moving parts, and confirm no bare conductor remains visible outside any connector. Slide the canopy into place only when every joint has been checked, because reopening a finished canopy to chase a loose wire wastes effort and risks disturbing sound connections.
Attach any light kit or control module in the order the maker sets out, supporting glass shades from below while their fixings tighten. Avoid overtightening small screws into cast parts, which can crack housings, and avoid leaving anything merely finger tight, which invites vibration. Spin the motor shaft gently by hand before blades go on, listening for scraping or catching that would signal a trapped wire or misaligned cover. A silent hand turn is reassuring, while any grinding or resistance means stop, reopen, and find the cause before power ever returns to the circuit.
Step Four: Attaching Blades and Testing Balance and Direction
Fit blade irons to the motor first if the design separates them, then attach each blade flat and square, tightening fixings evenly across every blade in turn. Measure from the ceiling to the tip of each blade while rotating the assembly slowly by hand, since equal heights suggest true brackets and level seating. A blade sitting noticeably lower often traces back to a bent iron or a loose fixing, and gentle correction now prevents a rhythmic wobble later. Keep blade screws accessible until testing finishes, in case small adjustments are needed after the first powered run.
Restore power at the breaker and test on the lowest setting first, watching from a safe position rather than standing directly beneath the fan. Listen for hums, clicks, or rattles, and observe whether movement settles as speed rises or grows worse, because worsening movement points to imbalance rather than normal behaviour. Use the supplied balancing kit methodically, moving a small clip along one blade at a time and noting which position calms the motion most, then fix the permanent weight where testing showed the best result. Recheck canopy and bracket screws after early runs, since initial vibration can reveal a fixing that felt tight by hand.
Efficiency also deserves attention once the fan runs quietly. The Energy Star ceiling fans page explains that certified ceiling fans are designed to move air more efficiently than conventional models when correctly sized for a room, which reinforces the value of matching blade span to floor area. Set direction for the season, downward airflow when cooling matters most and a gentle upward movement when redistributing warm air near the ceiling matters more, always changing direction only while the blades are still. Finish by testing every control, wall switch, remote function, and light setting, then keep the instructions, spare fixings, and balancing weights together in a labelled envelope for whoever maintains the fan in future years.


