
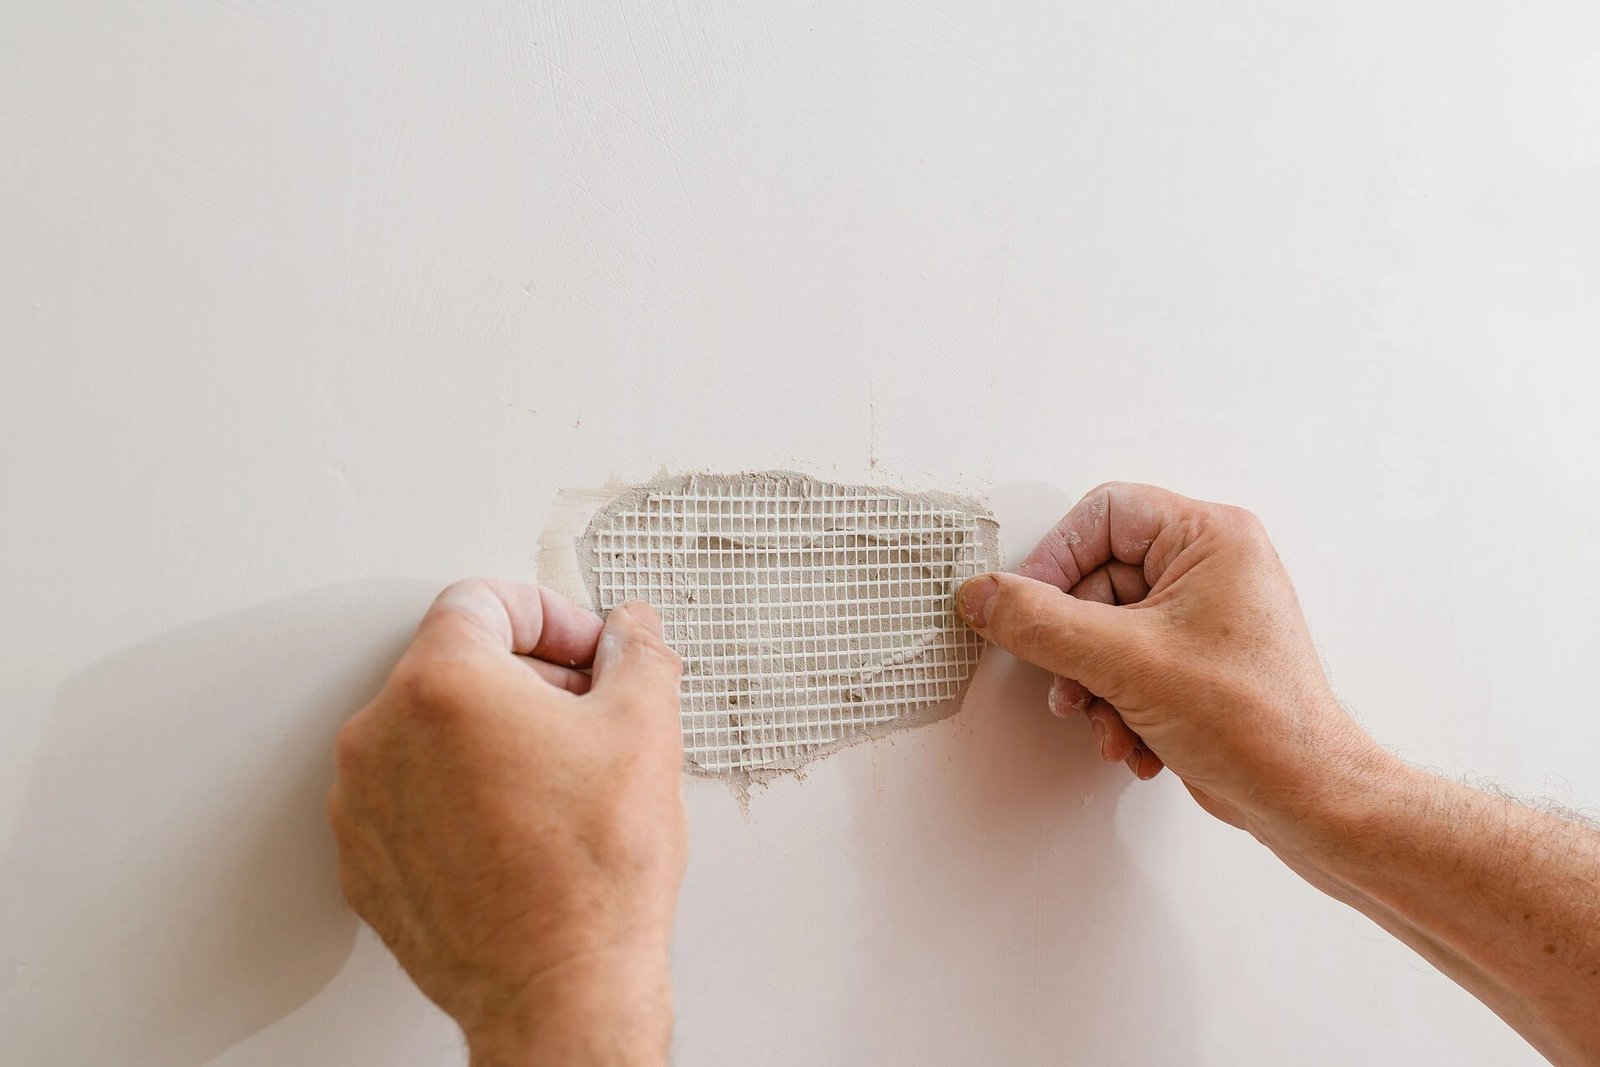
A hole left by a doorknob or a slipped anchor looks alarming, yet the repair materials sit on one hardware shelf and the technique scales from pinhole to palm sized damage. Matching method to hole size is the whole secret.
Wall damage frightens people out of proportion to its difficulty, mostly because a dark opening looks structural when it is usually only surface deep. Drywall panels are soft by design, easy to cut and sand, and that softness cuts both ways: they dent under everyday knocks, then accept repair material just as readily. The sections below rise steadily from nail holes to damage needing new board, so read until the description matches your wall and stop there, because the smaller methods genuinely cannot carry the bigger jobs.
What size of drywall hole can a simple filler handle alone?
Filler alone handles the smallest damage: nail and screw holes, shallow dents, tiny anchor openings, and hairline dings where the paper face stays mostly intact. Anything roughly the width of a thumb or narrower usually needs nothing behind it, because the filler bridges such a small gap without sagging while it dries. Press the filler in with a flexible putty knife held nearly flat, push slightly harder than feels necessary so the material packs the depth of the hole, then scrape the excess away in one clean pass.
The limit arrives when the opening grows wide enough that filler slumps into the cavity behind the board or cracks as it shrinks. A hole approaching the width of a golf ball sits at that boundary, and damage beyond it repaired with filler alone tends to sink, star crack, or fall out entirely the next time the wall takes a knock. Depth matters as well as width: a shallow dent in the paper can be filled even when fairly broad, while a narrow but fully pierced hole may still need mesh support behind the surface.
Technique decides how invisible these small fills become. Slightly overfill, because lightweight filler shrinks a touch while drying, then sand flush once hard with a fine block worked in small circles. Run a palm across the area with eyes closed, since fingertips detect ridges that eyes miss under flat light. If the fill catches a fingernail at its edge, one more whisper thin skim and a second light sanding will level it, and two thin passes always beat one thick mound that dries rough and sands unevenly.
Which patch style suits damage wider than a clenched fist?
Damage wider than a fist has usually lost too much board for surface patches to span safely, and the lasting repair cuts the opening square and fills it with a fresh piece of board. The method described in detail at California patch method for bigger holes leaves a margin of face paper around the new piece, and that paper flange overlaps the surrounding wall, bonding the patch in place while the joints are coated. It suits openings up to a moderate size where the surrounding board stays sound and dry.
Understanding what the panel is made of explains why this works so neatly, and the background at Wikipedia overview of drywall composition and history covers the gypsum core pressed between paper faces in useful detail. The paper is not decoration: it gives the panel its surface strength and gives compound something to grip. A patch that keeps its paper flange therefore ties into the wall surface properly, while a bare chunk of gypsum pushed into a hole relies only on compound at its edges and tends to crack along those edges within months.
Self adhesive mesh and metal backed patches still have their place in the middle range, roughly between a thumb width and a fist. The mesh sticks over the opening, compound works through the grid, and the patch bridges damage that filler alone could not span. Push the first coat firmly so material keys through the mesh and locks behind it, but do not bury a mid sized patch under a deep single coat, because thick compound over mesh dries slowly, shrinks unevenly, and often telegraphs the square outline of the patch through the finished paint.
How many coats of compound does a repair usually need?
Most repairs need two or three coats, and the reason sits in how the material behaves while drying. The explanation at Wikipedia explanation of joint compound and taping describes compound as a drying material rather than a setting one, which means water leaves it gradually and slight shrinkage follows. A first coat fills and levels, a second coat erases the shrinkage and the knife marks, and a third feathering coat, spread wider than the last, dissolves the edge of the repair into the surrounding wall so no outline survives painting.
Each coat should go on thinner than instinct suggests. A loaded knife bent slightly against the wall leaves a film rather than a layer, and that film dries hard and even. Thick applications stay soft in the middle long after the surface feels dry, then crack in a web pattern or sag at the lower edge. Working the knife in long strokes from the centre outward, cleaning its edge on the pan between passes, and resisting the urge to keep touching drying material all protect the finish far more than any special product does.
Feathering distance grows with each coat. The first pass might spread only slightly beyond the patch, the second extends a hand span further, and the final pass can reach well beyond the damage in every direction. That gradual widening is what makes a repair vanish, because the eye detects sudden level changes far more readily than gentle ones spread over a wide area. Sanding between coats stays light: knock down ridges and lumps, leave the feathered edges alone, and never sand back through to the mesh or tape, which then shows as fuzz under paint.
Why does a patch stay visible after painting over it?
A patch usually shows because dried compound drinks paint differently from the paper around it. The compound surface is porous, the original paper face is comparatively sealed, and one finish coat lands unevenly across that boundary, leaving a dull flat patch that catches light at an angle even when the colour matches perfectly. Painters call that effect flashing, and it appears most clearly on walls lit by windows from the side, precisely where living room repairs tend to sit.
Primer solves the problem by sealing both surfaces to the same absorbency before colour coats arrive. A coat of primer over the repair, feathered slightly beyond its edges, gives the finish paint a uniform base, and the patch disappears because light now reflects evenly across the whole wall. Skipping primer to save half an hour is the single most common reason an otherwise flat, well sanded repair announces itself. Where the original wall carries a slight texture, stippling the primer with a roller rather than brushing it smooth keeps the repaired area blending with its neighbours.
Texture mismatch causes the second kind of visible patch. A perfectly smooth repair in the middle of a lightly textured wall stands out as a polished island, especially after sanding with a fine block. Matching texture takes a dabbed sponge, a roller with a longer nap, or a light spray texture applied before priming, tested first on scrap board. Colour mismatch causes the third kind: old paint fades, so even the original tin may dry slightly different on a fresh patch, and painting the whole wall section from corner to corner remains the reliable answer.
What backing support keeps a large repair from cracking later?
Large repairs crack when their edges flex, and edges flex when nothing solid holds the new board from behind. The sturdy solution slips a length of scrap timber, wider than the opening, through the hole, holds it flat against the inside face of the wall, and screws through the surrounding board into that timber at both ends. The backing piece now bridges the opening like a small hidden beam. The new board piece screws to it firmly, and the whole repair gains the rigidity of the original panel instead of relying on compound alone.
Screw placement matters. Drive fixings near the ends of the backing timber where it bears against sound board, sink each head just below the paper surface without tearing through it, and add a central fixing where the patch piece meets the timber. A torn paper face around a screw head loses most of its holding strength, so a drill with an adjustable clutch, or careful trigger control, earns its keep here. Once the patch sits immovable under a firm palm push, taping and coating can begin with confidence that movement will not reopen the joints.
Joint tape over the seams adds the second line of defence. Paper tape embedded in a bed of compound ties patch and wall together across the join, while mesh tape offers easier handling for beginners at slightly lower strength. Either way, the tape must lie flat with no bubbles or lifted edges, because any hollow under the tape becomes a crack line months later when the house shifts with the seasons. Corners of the patch deserve particular care, since stress concentrates there and a diagonal crack from a corner is the classic failure of a rushed large repair.
How long should each layer dry before sanding begins?
Drying time depends on coat thickness, room warmth, and humidity, but patience is the governing rule. A thin coat in a warm, ventilated room often feels hard within a few hours, while a deeper fill in a cool damp space can need a full day before sanding stops clogging the paper. Compound changes colour as it dries, turning uniformly pale when ready, and any remaining darker patch signals moisture still trapped inside that will gum the sandpaper and tear the surface if worked too soon.
Sanding early causes more rework than sanding late ever does. Soft compound rolls into pills under the block, ridges form instead of flattening, and the mesh or tape beneath can tear free. When in doubt, wait longer, run a fan toward the wall, and test an inconspicuous corner of the repair with the block before committing to the whole area. If dust comes away dry and powdery, the coat is ready; if it feels cool or slightly tacky to a fingertip, give it more time.
The whole repair, from cutting the opening to final primer, typically spreads across two or three days for larger damage, though hands on time stays modest. Most of those hours belong to drying, not labour, which is why planning a repair around other tasks works well: coat in the morning, sand and recoat the next day, prime once the final coat has dried fully. Rushing that calendar to finish in one afternoon almost guarantees the cracks, flashing, and visible outlines described above, and redoing a failed patch takes longer than the waiting ever would have.


One comment