Flaky pastry depends on cold butter staying in visible pieces until oven heat turns its moisture to steam and lifts the layers apart. The ingredient list stays short and inexpensive, costing little more than pennies per slice, so technique rather than spending decides the outcome. Keeping everything chilled and handling the dough sparingly produces a crust that shatters delicately instead of baking tough.
Most disappointing crusts fail for ordinary reasons: butter that warmed into the flour, water poured in all at once, dough kneaded like bread, or a rolling session that dragged on while the kitchen warmed up. Every one of those errors has a plain correction, and none of the corrections costs anything. A homemade crust is also one of the cheapest respectable things a kitchen produces, cheaper even than other simple flour doughs, and a cook learning to roll one is building the same hand skills used when making tortillas safely at home, where a rested dough and a confident roll matter just as much.
Pie Crust Costs Counted in Flour, Butter and Cents
A double crust for a standard nine inch pie pan asks for about two and a half cups of all purpose flour, one cup of cold butter cut from two sticks, a teaspoon of salt, a spoonful of sugar, and several spoonfuls of ice water. That is the whole list. The flour costs only a small number of cents per cup at ordinary supermarket prices, the salt and sugar together barely register, and the butter carries nearly the entire cost of the project on its own.
Add the parts together and the flour and butter land somewhere around one hundred twenty to one hundred sixty cents altogether, depending on the butter on offer that week. Spread across eight slices, each slice carries a crust cost of roughly fifteen to twenty cents, and even a generous serving pattern keeps the whole crust well under the price of a single coffee. Filled pies in pastry have been eaten for centuries on exactly this cheap logic of flour, fat, and filling, as Wikipedia’s survey of pie through history makes plain when it traces pies from sturdy early pastry cases to the fruit filled versions now standard in American kitchens.
Set that total beside a refrigerated ready made crust from the shop, which commonly costs several times as much for two thinner, smaller rounds, and the saving stops looking trivial across a year of baking. The shop crust also fixes its own thickness, its own salt level, and its own fat blend, while a homemade batch lets you spend the same cents on better butter when the filling deserves it. Cost, in other words, was never a good reason to buy the box, and the technique below is the only real barrier.
Cold Butter Habits That Protect Pie Crust Flakes
Flakes are built before the oven ever gets involved. Butter cut into the flour in pea sized pieces stays as distinct pockets inside the dough, and once the pan reaches full heat, the moisture trapped inside each pocket becomes steam and lifts the flour layers around it apart. Butter that melts into the flour beforehand cannot do that work, which is why warm hands, a warm bowl, and a warm kitchen quietly erase flakiness long before baking starts.
Work cold at every step. Cube the butter and return it to the refrigerator while you measure the flour, chill the mixing bowl on a hot day, and use water with actual ice floating in it rather than water that merely feels cool from the tap. The pastry entry on Wikipedia outlines this same family of doughs, where fat distributed through flour in pieces is what separates short, tender pastry from bread like dough. If the kitchen is genuinely hot, slide the mixed dough back into the refrigerator for ten minutes whenever it starts to feel soft or greasy under your hands.
One habit helps shaky beginners more than any other: grate the butter while it is frozen, using the coarse side of a box grater, then toss the shreds straight into the flour. Frozen shreds stay separate far longer than cubes do, they distribute evenly without any cutting tool, and cold hands barely matter because the work takes under a minute. Flour the grater lightly first so the butter releases cleanly, work over the bowl so nothing warms on the counter, and return the bowl to the refrigerator for ten minutes afterward on a hot day. The shreds melt into the same steam pockets as cubes do, and the flakes come out just as distinct.
Choose the fat with the result in mind. All butter gives the finest flavour and a rich colour, though it softens fastest and demands the coldest handling. A portion of shortening in place of some butter holds shape more stubbornly and tolerates a warm room, at the cost of flavour. Either way, the pieces should still be visible as pale streaks and lumps when the dough comes together, because a dough that looks perfectly smooth at this stage has already lost the layers you were trying to build.
Mixing Pie Crust Dough Without Building Tough Gluten
Toughness comes from gluten, and gluten grows when flour meets water and movement together. Cut the butter into the flour first, using a pastry cutter, two knives, or quick fingertips, until the mixture looks like coarse crumbs with plenty of pea sized lumps. Only then add the ice water, a spoonful at a time, tossing the mixture with a fork after each addition and stopping the moment the crumbs hold together when squeezed in your fist.
Most batches need somewhere around six to eight spoonfuls of water, and the exact amount shifts with the weather and the flour. Dry crumbs that refuse to hold need one more spoonful, while a dough that feels sticky has already taken too much and will bake tough no matter how gently you roll it. A small amount of vodka in place of part of the water can make the dough easier to roll, because it wets the flour for handling while limiting how much gluten forms, and its alcohol bakes away in the oven.
Tip the shaggy mass onto the counter and press it together using the heel of one hand in a few short pushes, just until it forms a rough disc with no dry pockets. This pressing, done two or three times, smooths the dough without kneading it. Divide the dough in two, shape each half into a flat disc, wrap both discs tightly, and stop touching them. Every extra minute of handling at this stage trades tenderness away for neatness the finished crust will never show.
Chilling, Rolling and Fitting Pie Crust Into the Pan
Rest the wrapped discs in the refrigerator for at least one hour before rolling. The rest does three jobs at once: the butter firms back up after handling, the flour finishes absorbing the water so the dough rolls without cracking at the edges, and the gluten stretched during mixing relaxes, which keeps the crust from shrinking back and leaving a gap around the edge of its tin in the oven. Dough that skips this rest fights the rolling pin and springs back like elastic.
Work with a single disc while its partner stays wrapped in the cold, then swap them if the kitchen feels warm. A disc taken straight from the refrigerator should feel firm when pressed at the rim yet give slightly under steady pressure from a thumb. If the rim smears at once, return it for another short chill before any rolling begins.
Roll on a lightly floured surface, starting from the centre and pushing outward, turning the dough a quarter turn after every few passes so it keeps a round shape and never sticks. Roll to a circle a couple of inches wider than the pan, and keep the thickness even rather than chasing perfect edges. If the dough cracks at the rim, it is a touch too cold, so give it five minutes on the counter; if it sticks and smears, it is too warm, so chill it briefly on a tray.
Lift the rolled dough by draping it over the rolling pin or folding it loosely into quarters, then settle it into the pan without stretching it. Stretched dough shrinks back during baking and can pull a filled pie badly out of shape. Press it gently into the corners, trim the overhang, and fold the edge under for a double crust or crimp it for a single one. Chill the fitted shell while the oven heats and the filling comes together, because a cold shell hitting a hot oven sets its shape before the butter can slump.
Baking Pie Crust Hot Enough for Shattering Layers
Heat does the final work, and it needs to arrive fast. Set the oven to four hundred twenty five degrees Fahrenheit for filled fruit pies, so the butter pockets steam hard before they can melt and soak into the flour. A pie that starts in a lukewarm oven leaks butter into the filling and sets up pale and greasy, while a pie that starts hot puffs its layers early and colours deeply. Many recipes lower the heat partway through so the filling can finish without scorching the rim.
For a blind baked shell, line the chilled crust with parchment, fill it with dried beans or pie weights, and bake until the edges set and colour lightly, then lift the weights out and bake the base a few minutes more until it looks dry. Docking the base with a fork helps steam escape, though weights alone usually hold the floor flat. A soggy bottom on a filled pie often traces back to a cool oven or a filling that went in cold, and a metal or glass pan set on a preheated tray gives the base the head start it needs.
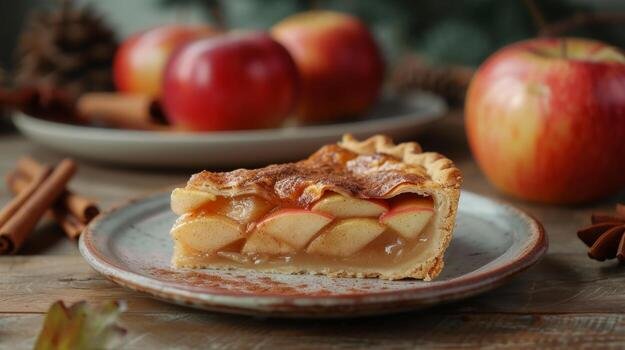
Judge the finished crust by eye and by ear as much as by time: deep golden colour at the rim, juices bubbling thickly at the centre of a fruit pie, and a base that sounds firm when tapped. Pull the pie when the edges look properly browned rather than merely blond, because pale crust tastes raw even when the filling is done. Cool a fruit pie for several hours so the filling sets into clean slices, then do the final arithmetic: a few handfuls of flour, two sticks of butter, and a total counted in cents produced the whole thing, which is why the homemade version keeps winning on cost and on texture alike.