
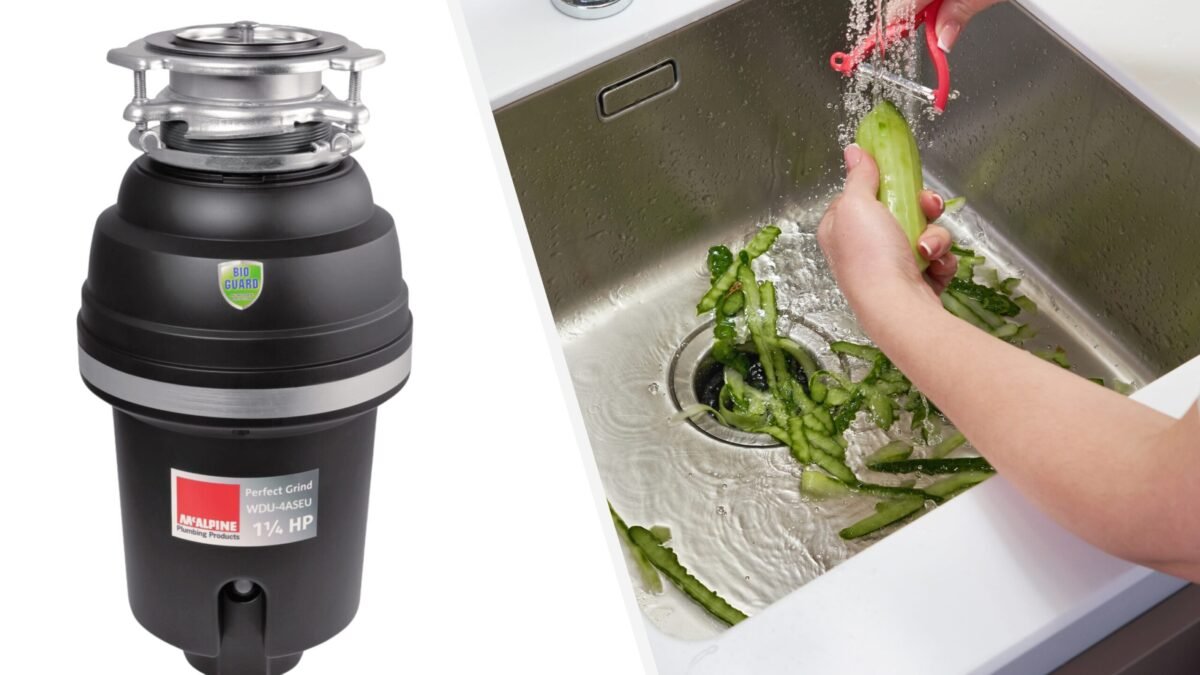
A disposal that only hums is rarely silent about its problem, because that sound says electricity is arriving while rotation has stalled. In many kitchens the cause is a trapped fragment locking the spinning plate rather than a motor that has given up. Resist reaching inside, cut the power properly, and work from underneath where the makers left a manual release. Handled in that calm order, the repair often takes minutes and needs no replacement unit. The steps below keep safety first at every stage, because no cleared blockage is worth an injured hand.
A Steady Hum Usually Means Power Arrives but Turning Stops
Listen carefully when the switch is flicked. A quiet hum with no grinding, no splashing, and no movement in the sink opening points to a plate that cannot rotate while the motor strains against whatever holds it. Bottle caps, fruit stones, small bones, and stray cutlery are frequent culprits, wedged tightly between the moving plate and the fixed ring around it.
Restoring a humming unit without overspending starts with patience, since most stalls respond to the same freeing and resetting work rather than a replacement. Sound advice on how to fix garbage disposal problems on a budget reinforces that order, beginning with the manual release and the overload button before any talk of a new appliance. Keep that sequence in mind and avoid repeated switch flicking, which only heats a straining motor.
Reference pages on garbage disposal units explain that the appliance shreds food waste into small particles so it can pass through plumbing, sitting beneath a kitchen sink where waste enters from above. Understanding that layout clarifies the fault, because material that cannot be shredded finely enough can lock the very plate meant to break it down, leaving power present but motion absent.
Before assuming the worst, note what else the unit tells you. Water draining freely suggests the blockage sits inside the chamber itself, while slow drainage hints at a separate restriction further along the pipe. A burning smell, repeated tripping, or a hum that persists after the plate turns freely points elsewhere, and those possibilities are covered after the basic freeing routine has been tried properly.
Cut Power Completely Before Anything Goes Near the Chamber
Turn the wall switch off first, then remove power at its source. Unplug the unit beneath the sink where a cord and outlet are fitted, or switch off the matching breaker where the disposal is wired directly. Treat the appliance as live until that second step is done, because a wall switch alone can be bumped, mislabelled, or misunderstood by someone else entering the kitchen.
With power confirmed off, use a torch to look down through the sink opening. If a visible object sits loose on the plate, lift it clear with tongs or narrow pliers, keeping fingers entirely outside the chamber at all times. The lugs inside are blunt but unyielding, the ring edges can cut, and a freed plate can shift suddenly, so hands never belong inside even when everything appears still and silent.
Clear the area beneath the sink as well. Move bottles and boxes aside, lay a towel to catch drips, and keep a small container nearby for any retrieved fragments. Good light and dry hands matter under there, where the reset button and the underside socket both need to be found by feel as much as by sight in the cramped space below the basin.
Resist chemical shortcuts entirely at this stage. Caustic drain products can damage seals, splash dangerously during later handling, and do nothing at all for a mechanically locked plate. Mechanical freeing, done with power off and tools only, solves the actual problem without adding a chemical hazard to a cramped workspace.
Free the Plate From Beneath Using the Underside Socket
Crouch down and find the centre of the base of the unit. Most models carry a hexagonal recess there, designed for manual turning when the plate locks. Fit the matching hex key snugly, or the wrench supplied with the appliance if it still lives in a nearby drawer, and push firmly in one direction until resistance is felt, then work back in the opposite direction.
Tool references on hex keys note the hexagonal cross section used to drive bolts and screws with matching sockets, which is exactly the shape fitted beneath many disposals. That simple connection turns the motor shaft directly, rocking the plate against the trapped fragment until it shifts, loosens, and finally lets the plate sweep through a full circle without catching.
Repeat the rocking motion patiently rather than forcing a single hard push. Short, firm movements in both directions usually free a jam more reliably than brute strength, and several complete turns in each direction confirm the plate is truly clear rather than merely past the tightest point. If gritty resistance remains in one spot, pause, recheck from above with tongs, and remove whatever has worked loose.
While still underneath, locate the small reset button near the base. Most units include an overload reset that cuts power when the motor strains, protecting the windings until the button is pressed again. Press it firmly once the plate moves freely, and note whether it stays in, because a button that springs straight back out suggests the motor remains bound or overheated and needs more cooling time or further clearing.
Clear Loose Debris With Tools and Restore Power to Test
Before restoring power, sweep the chamber once more from above using tongs or pliers. Small fragments left behind can lock the plate again within seconds of restarting, undoing careful work underneath. A wooden spoon handle can nudge stubborn pieces toward the centre where tongs grip them more easily, still keeping skin well clear of every edge inside.
Reconnect the plug or restore the breaker, then run a strong stream of cold water into the sink. Cold water is standard operating advice because it keeps fats solid so they flush away rather than coating pipes, and that habit matters during testing as much as during daily use. With water flowing, switch on briefly and listen for an even, unstrained roar rather than the earlier trapped hum.
Let the unit run with water for a short spell after it starts cleanly, flushing loosened particles through the plumbing. Grind nothing else during that first test run. If the hum returns at once, switch off, cut power again, and repeat the underside turning and chamber clearing, because a second fragment often hides beneath the first. If running is smooth but drainage stays slow, the difficulty likely sits beyond the disposal in the trap or pipework.
Return to normal use gradually. Feed small amounts of soft waste while cold water runs, keep the water flowing briefly after grinding finishes, and avoid packing the chamber tightly. A unit that has just been freed deserves a gentle first day, and that restraint helps confirm the repair has truly held rather than merely postponed another stall.
Sounds and Smells That Point Toward Replacement Instead
Some symptoms argue against further freeing attempts. A plate that turns freely by hand underneath, a reset button that holds, and yet only a hum at the switch together suggest windings that have failed internally. Leaks appearing from the lower housing rather than from pipe joints point to a worn internal seal, which is not a serviceable part in most domestic units.
Repeated breaker tripping, visible scorching near the base, or a strong electrical burning odour also favour replacement over persistence. Age strengthens that judgement when breakdowns arrive close together, because worn bearings, tired motors, and corroded chambers tend to progress together. At that point money spent coaxing another brief revival is usually better directed toward a new unit fitted properly.
Grinding that sounds harsh and uneven even when empty can signal loose or damaged components that manual turning will not cure. Likewise, a unit that starts only after repeated reset presses is warning that its protective system is working harder than it should. Note these patterns honestly rather than hoping a familiar trick will keep succeeding indefinitely.
When replacement is chosen, keep the same safety discipline during removal and fitting, or hire a qualified person for the plumbing and electrical connections. Photograph the existing pipe layout before loosening anything, keep the sink area dry, and test the new unit with cold water only before grinding any waste. Careful fitting protects both the appliance and the cupboard beneath it.
Why does the reset button keep popping back out?
The button usually pops out when the motor is still strained, still hot, or still locked by debris. Let the unit cool, repeat the underside turning until the plate sweeps freely, clear the chamber with tongs, and then press the button once more with power still off before testing again.
Can ice help keep the chamber clean between jams?
Grinding a tray of ice with cold water running can loosen light residue from the chamber walls and plate. It is a gentle freshening habit rather than a repair, and it works best alongside regular use, gradual feeding, and keeping grease, fibres, and hard fragments out of the unit altogether.
What should never be put through the disposal?
Keep out large bones, fruit stones, stringy fibres, cooking grease, and anything that is not food. Starchy scraps in bulk can form a heavy paste, while non food items can lock the plate outright. Small, soft food waste fed gradually with plenty of cold water is what the appliance handles comfortably.
When is calling a professional the wiser choice?
Call for help when leaks come from the unit body, wiring looks damaged, the breaker trips repeatedly, or discomfort with under sink plumbing and electrics remains after reading the maker instructions. A short professional visit costs less than a flood, a shock, or a replacement ruined by an incorrect fitting.
Keeping the maker booklet near the sink cabinet also helps, because socket size, reset position, and wiring notes differ slightly between models and brands.


